Security
Introduction
The previous section was about fine-tuning the Frank!Framework. You learned about the DTAP stage and about setting properties. This section continues about fine-tuning the Frank!Framework. You will learn how to restrict access to the Frank!Console. On your production environment this is important, because you want to protect the integrity of your data and you do not want unauthorized users to read customer data. There are two ways of configuring security for your application: Containerized Authentication and JEE Provided Authentication. Containerized Authentication uses properties in the Frank!Framework to set up authentication and is the recommended way of setting up authentication. JEE Provided Authentication is based on JEE authentication and cannot be used in containerized environments.
Containerized Authentication
To add authentication to your Frank!Console Open your DeploymentSpecifics.properties and add the following lines of code:
# Define the available authenticators
application.security.http.authenticators=inMem

# Configure the authenticator
application.security.http.authenticators.inMem.type=IN_MEMORY
application.security.http.authenticators.inMem.username=ADMIN
application.security.http.authenticators.inMem.password=PASSWORD1234

# # Set the authenticator on an endpoint
servlet.IAF-API.authenticator=inMem
servlet.Console.authenticator=inMem
In doing so you have defined the in-memory authentication system of the Frank!Framework. Additionally, you have set the username to “ADMIN” and the password to “PASSWORD1234”. Your Frank!Console is now protected. If you now save your changes and restart your Frank!, you should see a popup asking for credentials. Once you enter the credentials correctly you will be able to use the Frank!Console as normal.
The first line that you previously added to your DeploymentSpecifics.properties is as follows:
application.security.http.authenticators=inMem
This is the definining line of adding authentication to your Frank!. Here you define an authenticator with the name “inMem” which can be given additional properties later on. In order to define the type and properties of this authenticator we have to refer to it’s name. We do so in the following three lines:
application.security.http.authenticators.inMem.type=IN_MEMORY
application.security.http.authenticators.inMem.username=ADMIN
application.security.http.authenticators.inMem.password=PASSWORD1234
You notice that the first line in this snippet references the type “IN_MEMORY”. This is one of five types available for authentication. The types of authenticators are listed below. The types and their properties can be found in the table “Authenticators & Properties.”
“AD”, ActiveDirectory
“CONTAINER”, Jee
“IN_MEMORY”, InMemory
“OAUTH2”, OAuth2
“NONE”, NoOp
The last line is the assigment of the authentication system.
servlet.Console.authenticator=inMem
Here we say that the Console servlet (the Frank!Console) should be protected by the authentication system that we defined before. Without this line, the console remains unprotected.
The “NONE” type is the default for authenticators and simply indicates an absence of an authenticator. Functionally it does nothing. Below is a table containing all authenticator types and their properties.
Type |
Properties |
|---|---|
Jee |
Application Server defined settings |
ActiveDirectory |
domainName, url, baseDn, followReferrals, searchFilter, roleMappingFile |
InMemory |
username, password |
OAuth2 |
scopes, authorizationUri, tokenUri, jwkSetUri, issuerUri, userInfoUri, userNameAttributeName, clientId, clientSecret, provider, roleMappingFile |
JEE Provided Authentication
When you use Apache Tomcat as your application server, you can configure security by editing the Apache Tomcat configuration files. You do not need a manual deployment of Apache Tomcat to practice. Instead you will use the Frank!Runner which installs Apache Tomcat automatically, and then you will change the Apache Tomcat files manually. Please do not take this approach for your production environment. The Frank!Runner sometimes overwrites your security edits.
Please set up security as follows:
We recommend that you create a new directory to do this section. You are going to tweak files managed by the Frank!Runner. and you do not want your existing configurations to break. Let us call your directory
security.On a command prompt, please change directory to
securityand clone the Frank!Framework as follows:security> git clone https://github.com/ibissource/frank-runner
You can work with the example configurations of the Frank!Framework, so you do not need
build.properties. Please change directory to your Frank!Runner checkout and start the Frank!Framework as follows:security\frank-runner> start.bat
The Frank!Runner will download Apache Tomcat and the Frank!Framework. If you are using Windows, it will create a new command window to start Apache Tomcat. When you see the message
INFO: Server startup in <n> mswith<n>some number, then press ctrl-c to stop the Frank!Runner again. You need to do this in the new command window. Alternatively, you can runstop.batin the original command window.Please check that you have the following directory structure:
security
|- frank-runner
   |- build.xml
   |- start.bat
   |- stop.bat
   |- examples
   |- build
      |- apache-ant-1.10.7
      |- apache-tomcat-7.0.100
      |- h2
      |- openjdk-8u232-b09
      |- tmp
   ...
The file build.xml is an ANT script that is used by start.bat to start the Frank!Framewok. By changing build.xml, you can control the version of the Frank!Framework you are using. By default, you always use the latest version. The examples directory contains Frank configs that you can use out-of-the-box. You are using them because you did not provide build.properties. In the directory build, you see a subdirectory apache-tomcat-7.0.100 with your Apache Tomcat installation.
Warning
When you are reading this, you may be using later versions of Apache Ant, Apache Tomcat and the JDK. The directory names will be slightly different in this case. Please check the directory names you have. Use your directory names instead of the directory names you see in the reminder of this section.
Please open file
security\frank-runner\build\apache-tomcat-7.0.100\webapps\ROOT\WEB-INF\web.xmlin a text editor. Scroll down until you see the following:<!-- When a security-constraint element is present Tomcat will autenticate the user for all url's whereas WebSphere does this only for the url's mentioned in the security constraint(s). The PublicAccess security constraint will make Tomcat behave the same as WebSphere. --> <!-- security-constraint> <web-resource-collection> ... </security-constraint -->
Uncomment the
security-constraint, resulting in:<!-- When a security-constraint element is present Tomcat will autenticate the user for all url's whereas WebSphere does this only for the url's mentioned in the security constraint(s). The PublicAccess security constraint will make Tomcat behave the same as WebSphere. --> <security-constraint> <web-resource-collection> ...
At the bottom, uncomment the closing tag to arrive at:
        <role-name>IbisTester</role-name>
    </security-role>

</web-app>
Close the file you edited,
web.xmlOpen file
security\frank-runner\build\apache-tomcat-7.0.100\conf\tomcat-users.xml.The file has a lot of comments. The only non-commentary tags are the opening
<tomcat-users>and the closing</tomcat-users>. Between them, add a new user. Please insert the following XML:<user username="frank" password="frank" roles="IbisObserver"/>
You create a user with username
frankand passwordfrank. This user gets roleIbisObserver. The possibilities for the roles will be explained later in this page.
With security enabled, users should connect to your Apache Tomcat server through https. You need a dummy certificate for this and you need to enable https traffic in your server.xml file. Please do the following:
To create the dummy certificate, change directory to
security\frank-runner\build\openjdk-8u232-b09\bin. Execute the following command there:security\frank-runner\build\openjdk-8u232-b09\bin> keytool -genkey -alias tomcat -keyalg RSA
To enable https, edit
security\frank-runner\build\apache-tomcat-7.0.100\conf\server.xml. Uncomment the following piece:<Connector port="8443" protocol="org.apache.coyote.http11.Http11Protocol" maxThreads="150" SSLEnabled="true" scheme="https" secure="true" clientAuth="false" sslProtocol="TLS" />
Now you can start the Frank!Runner.
Please change directory to
security\frank-runnerand executestart.bat.Browse to http://localhost.
Your browser shows a message that your site is not secure. This is true, because your certificate was not signed by a Certificate Authority. For your production environment, you need a real certificate from a Certificate Authority. Every browser hides an option to carry on nevertheless. Apply this option to continue.
A dialog appears asking you to login, see below:
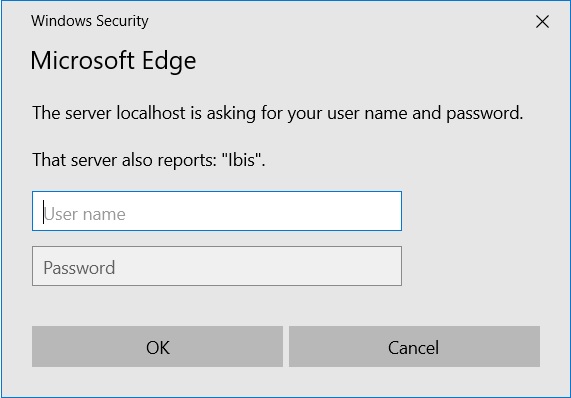
Enter username
frankand passwordfrank, the credentials you configured intomcat-users.xml. You should now see the Frank!Framework as shown below. You see an error that something is wrong with your security certificate, but you do enter the Frank!Console.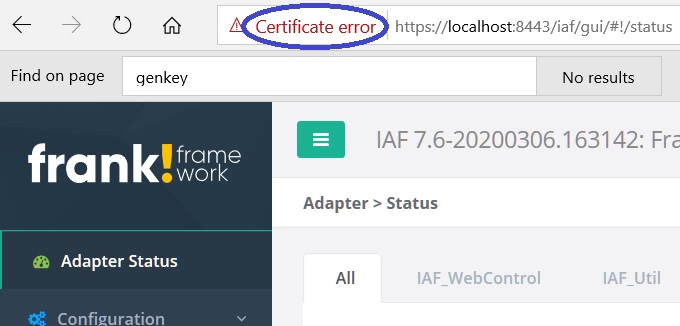
In the main menu, click “Testing” to expand it (number 1 in the figure below):
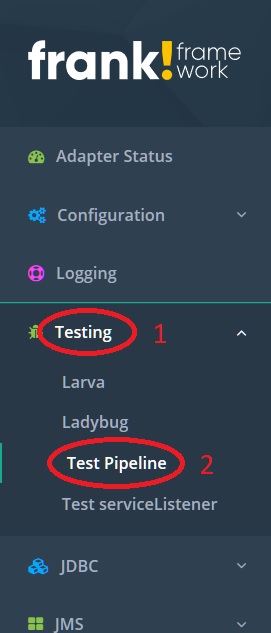
Click “Test Pipeline” (number 2). You see the page shown below:
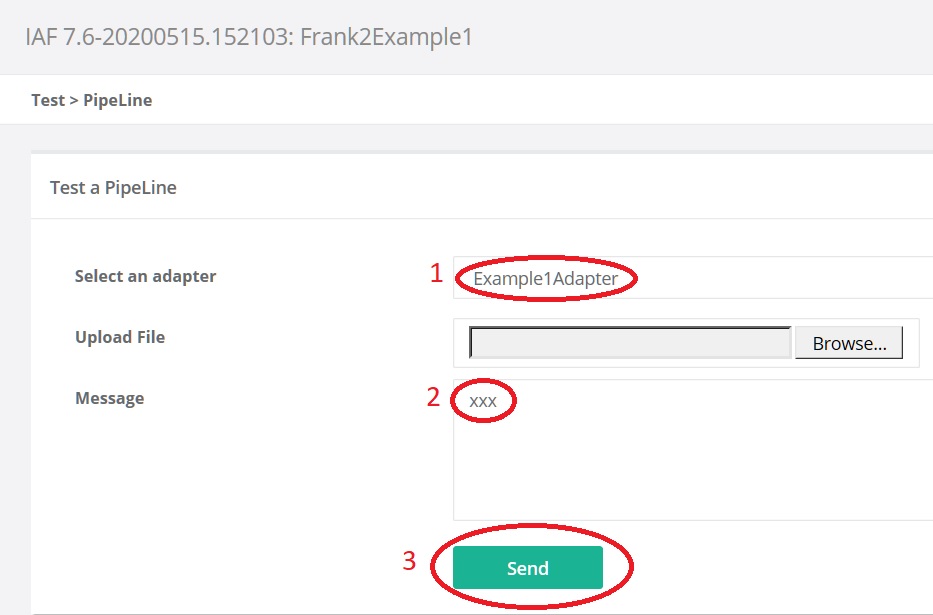
Select adapter “Example1Adapter” (number 1). Enter some dummy text in the Message field (number 2). Press “Send” (number 3).
To the top-right, the following message appears:

This message will normally be removed in about five seconds. You can see it longer by hovering over it.
Warning
Restricting access to the Frank!Console is not sufficient in itself to implement security. You also need to restrict access to your Apache Tomcat configuration and installation files, and you need to restrict access to your Apache Tomcat server. If you have an external database, you also have to implement security on that. All this is beyond the scope of the Frank!Manual.
Overview of security roles
With the above tutorial, you learned how security is configured. Now we explain what options you have to restrict access to the Frank!Console. Your options follow from the roles that are defined within the Frank!Framework. See the following list:
- IbisWebService
Can call an Ibis WebserviceListener.
- IbisObserver
Can look in configurations, statistics and log files.
- IbisDataAdmin
Can browse message logs, message stores and error stores, see section Processed Messages. Can resend or delete the messages in them. Can reload configurations and start and stop adapters. Has all IbisObserver permissions too.
- IbisAdmin
Can do a full reload and has all IbisDataAdmin permissions.
- IbisTester
Can execute jdbc query, send jms message, test a service and test a pipeline, has all IbisAdmin and IbisWebService permissions too.
Note
“What is ‘Ibis’?”, you might ask. This comes from the time before the frankemwork was renamed to Frank!Framework. In that time, the brands “Ibis” and “Ibis Adapter Framework” were used. These names have not all been replaced by their Frank! equivalents.
You can assign these roles to users, as you did when you edited tomcat-users.xml. You assign a value to the roles attribute that is a comma-separated list of roles. Each role should be taken from the list.