Scheduling
This section explains how to schedule tasks for periodic execution. This is very useful for batch processing jobs. You can also schedule tasks to do sanity checks of your site. You will practice with a sanity check for the database of the imaginary company New Horizons, see section New Horizons.
In section Uploading configurations, you saw two versions of the NewHorizons configuration. In the second version, we added the column “MODIFICATIONDATE” to the database table “product”. We also added an adapter that checks whether all apartments within the “product” table are up-to-date. An apartment is up-to-date if its modification date is less than two minutes ago. You will schedule this adapter.
Preparations
If you just did the previous section Uploading configurations, you do not have to do anything to prepare yourself. Otherwise please do the following:
Ensure that the second version of the NewHorizons config is running. Here is the
download linkagain. It is not important whether you are uploading your config to the database or whether you have it on the file system.Ensure that the directories
work\input,work\processing,work\processedandwork\errordo exist and are empty. See Preparations for more information.Ensure that database table “product” is empty.
Scheduling a job
Now that you are prepared, please continue as follows:
Restart the Frank!Runner. Choose your command-line from the previous sections based on wether you are uploading your configs to the database. After your chosen command line, you have to add
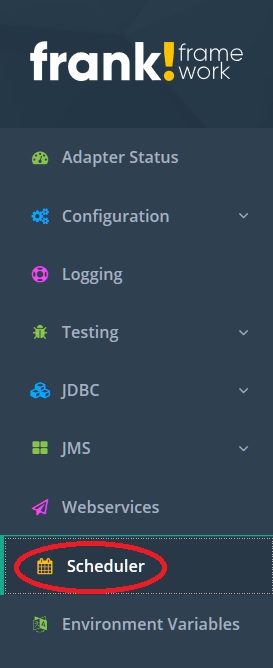
-DloadDatabaseSchedules.active=true. For example, when you are uploading your configs to the database, you do:franks\frank-runner> start.bat -Djdbc.migrator.active=true -Dconfigurations.names="${instance.name.lc},NewHorizons" -Dconfigurations.NewHorizons.classLoaderType=DatabaseClassLoader -Dwork=work -DloadDatabaseSchedules.active=trueIn the main menu choose “Scheduler” as shown:
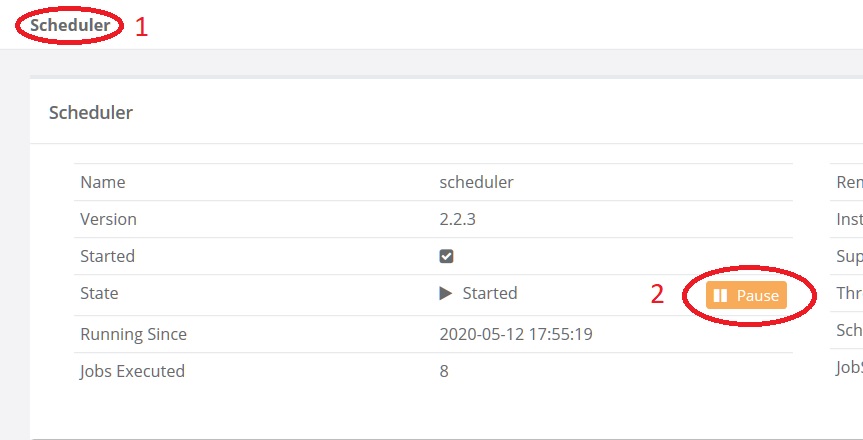
You see a lot of details about the scheduler component of the Frank!Framework, see the figure below. You see that you are in the scheduler page (number 1). You also have the option to pause the scheduler (number 2). To the top-right, there is a button “Add new schedule” (not shown).
Warning
The Pause button number 2 may not work in your version of the Frank!Framework. See GitHub issue https://github.com/frankframework/frankframework/issues/718. This issue has been fixed in version 7.6-SNAPSHOT, the latest version available on October 15 2020.
You need a string that defines how often you want to run your adapter. To get that string, you have to know that the scheduler of the Frank!Framework uses a Java component called “quartz”. When you search the internet for “quartz expression”, you may find the following site: https://www.freeformatter.com/cron-expression-generator-quartz.html. These expressions are alwo known as cron expressions. This give you an alternative website: https://devtoolcafe.com/tools/cron.
Here you can specify that you want to run your task every minute. The site will give you the string
0 * * ? * * *. You will use it later.Press the “Add new schedule” button. You see the page shown below:
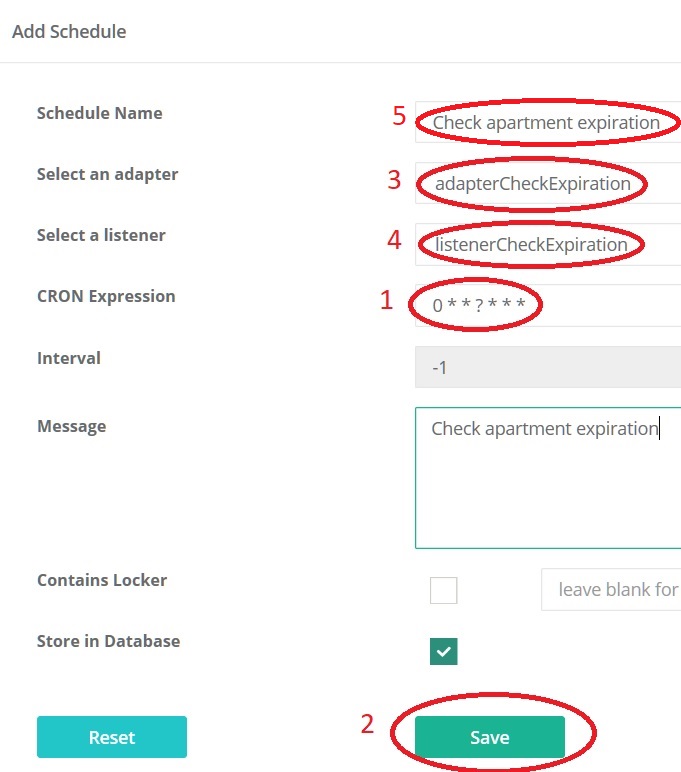
Fill in the string you found in step 5. You should put it in the text field annotated with number 1.
Select adapter “adapterCheckExpiration” (number 3) and the only possible listener “listenerCheckExpiration” (number 4). In a realistic situation, you should ask a Frank developer for these names.
For the schedule name number 5, enter “Check apartment expiration”. This name will be referenced in the reminder of this page.
Put something in the “Message” field.
Leave check box “Store in Database” checked. This way, your schedule remains active after you restart the Frank!Runner.
Press “Save” (number 2). To the top, a green bar should appear.
To the top-right, there is a button “Back”. Please press it.
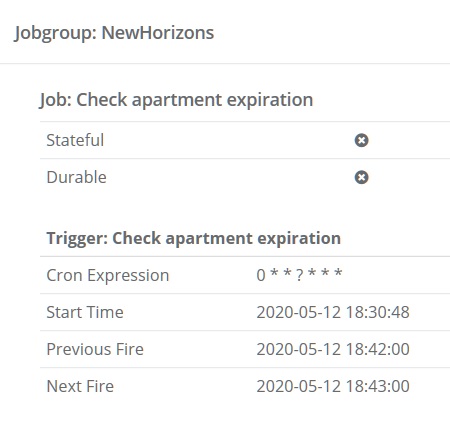
You are back in the main page of the scheduler. Now there is a job group “NewHorizons” as shown below:
Note
You see that scheduled jobs are grouped by Frank config. The Frank config of a job follows from the adapter being scheduled.
You can see when your adapter was executed last and when it will fire next. You can see that there is one minute between these times as you intended. Now you will examine what your job is doing.
In the main menu, go to “Logging”. search for the message “There were 0 expired apartments” with log level “INFO”. The loglevel should have a time stamp with seconds “00”.
Exercise: Use the NewHorizons config to enter some apartments like you did in the previous sections of this chapter. After about three minutes, you should see a messages with log level “ERROR” and text “There were n expired apartments” with n the number of apartments you entered.
Note
Frank configs that write to the logfile can be used to set up a monitoring page. There are tools in the market that scan logfiles and build a dashboard with monitoring information. An example is Splunk, https://www.splunk.com.
Please go to Testing | Ladybug. To the top-left, you see a table with a row for each adapter execution.
Press “Refresh”.
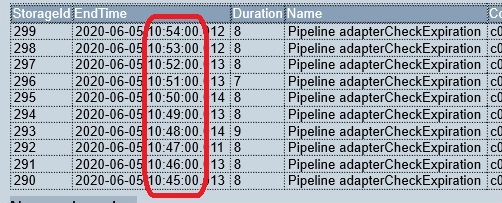
Please check that adapter “checkExpiration” runs every minute at second zero, see picture below:
Pause and resume
You can pause and resume scheduled jobs. To investigate, please continue as follow:
Go to the main page of the Scheduler (main menu option “Scheduler”). Scroll down to job group “NewHorizons”. To the far-right, you see the following buttons:
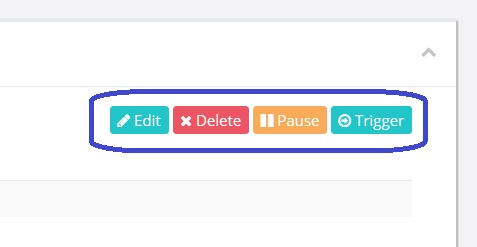
The shown buttons are next to job “Check apartment expiration”. You see that you can edit, delete, pause and trigger each job. Deleting and editing speak for themselves, but you will investigate triggering and pausing. Please continue as follows:
In the Windows taskbar, you have a clock as shown below. Please click it to expand it. In this new window, you also see the seconds.

Please follow the seconds of the clock until a new minute starts. Wait a few seconds and then trigger job “Check apartment expiration”. Then watch the seconds again until a new minute has started.
Go to Testing | Ladybug and press “Refresh”. You will examine the minutes and the seconds of your last three adapter runs. See the figure below:
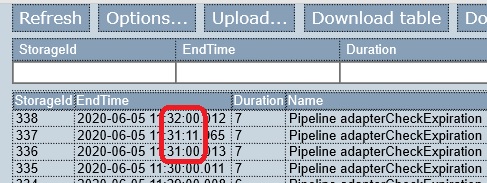
You see a job execution that did not happen at seconds “00”. Pressing the “trigger” button causes a job to be executed immediately. This has no effect on the scheduled moments for the job. The job is still executed at the next moment it is due.
Please return to the main page of the scheduler and scroll down to job group “NewHorizons”.
Please follow the seconds of the clock until a new minute starts. Wait a few seconds and then pause “Check apartment expiration”. The pause button will change into “ Resume”. Wait until the next minute starts and then again wait a few seconds. Then press “Resume”.
Go to Testing | Ladybug and press “Refresh”. Examine the minutes and the seconds of the last two adapter runs. See the figure below:
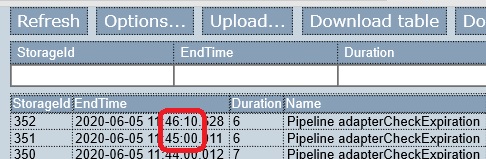
The first run is at the beginning of a new minute. In this minute, you paused the job. You did not start it before the new minute started, so the next run is not at the beginning of the next minute. You see that the job was executed immediately when you pressed “Resume”.
Warning
The behavior of the Resume button of a scheduled job has changed. From version 7.6-SNAPSHOT (snapshot versions from around October 15 2020 and later), the behavior is as follows. After you resume a scheduled job, it fires automatically at the next scheduled moment. If you want to run it immediately after resume, you can do this by triggering it manually.
Older versions of the Frank!Framework have different behavior. When you pause a job and later resume it, the scheduler checks whether a scheduled moment passed during the job pause. If so, the scheduler executes the job immediately on resume. Otherwise, resuming the job does not caause immediate execution. When a job is resumed before the next scheduled moment, the scheduler awaits that moment, executing the job at its due time.
If you want to know more about this change, you may look at the related GitHub issue: https://github.com/frankframework/frankframework/issues/764.