Edit test reports
This subsection shows how to edit captured Ladybug test reports. You can use this feature to create test reports without capturing interactive tests. In the previous subsection you saw that you can copy test reports. When you edit the copy, you end up with two different test reports without having to capture a manual test two times.
Editing test reports is also useful if the behavior of your System Under Test (SUT) changes. These changes may be errors to be corrected, or they may be legitimate updates. In the latter case, you can adjust your test reports to reflect the new reality. In some cases, editing is quicker than deleting the tests and recapturing them. This subsection also shows the meaning of the stub strategy.
We continue experimenting with the simplified archive introduced in Introduction. We continue with the situation from section Organize test reports. There is one captured test report obtained from calling adapter “sutArchive” with stub strategy “Never”. We will do another capture of “sutArchive” with a different stub strategy. This way, we demonstrate the use of this feature.
Please do the following:
Start the Frank!Framework if it is not running, see Preparations. Recreate the situation of Organize test reports. You may have a download of these test reports that you can upload (see Save and load captured test reports). It is important that you have a capture of running “sutArchive” with stub strategy “Never”, and that this test report has a description indicating this stub strategy.
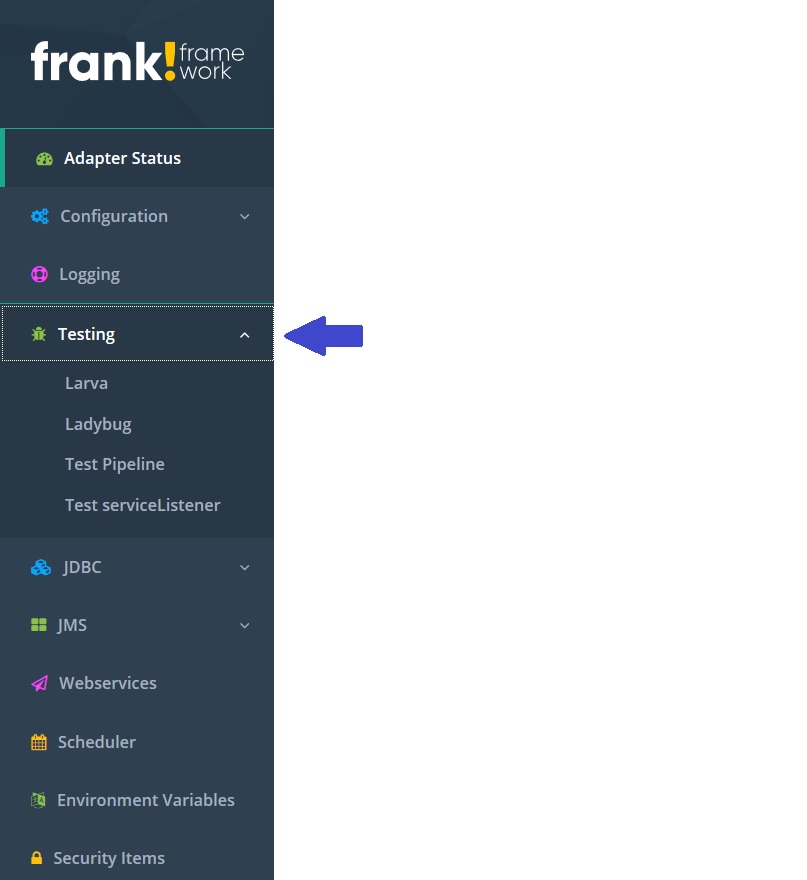
We do another capture of running “sutArchive”. Click “Testing” and “Test Pipeline”:
Select adapter “sutArchive” (number 1 in the picture below). Enter into the message field (number 2):
<document>This is the document</document>. Press “Send” (number 3).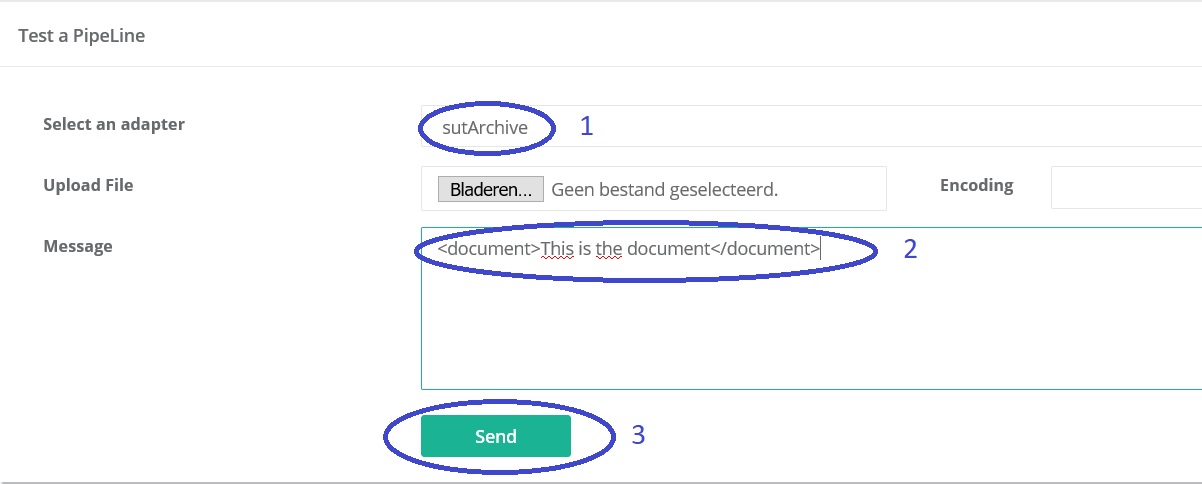
Below the send button, the response appears. Go back to Ladybug and press Refresh:

Select the line reporting about “sutArchive” (number 1 of picture below). Select the upper-most “Pipeline” node (number 2).
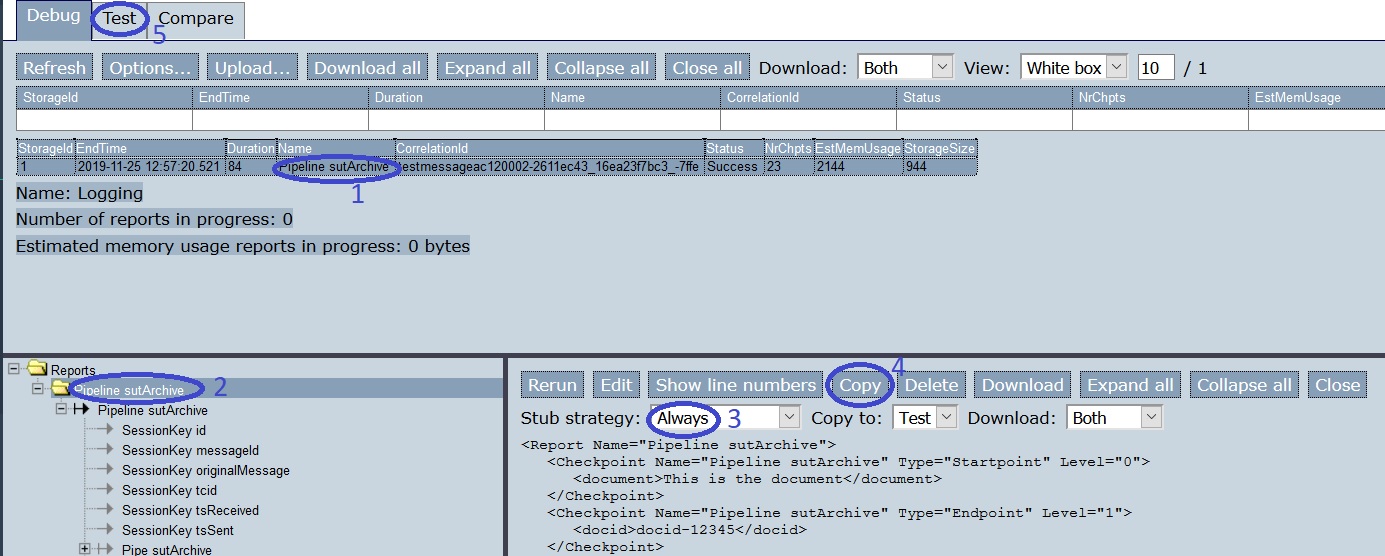
Set the stub strategy to “Always” (number 3).
Note
This is different from previous times. Then we chose “Never”, now we choose “Always”.
Press “Copy” (number 4). Then press tab “Test” (number 5). Here is the result:
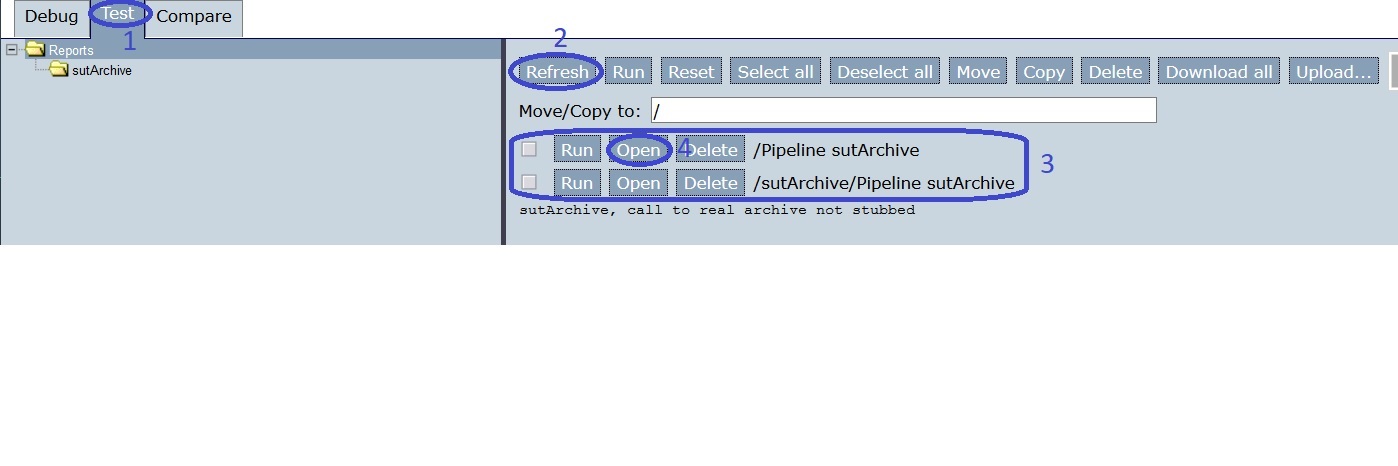
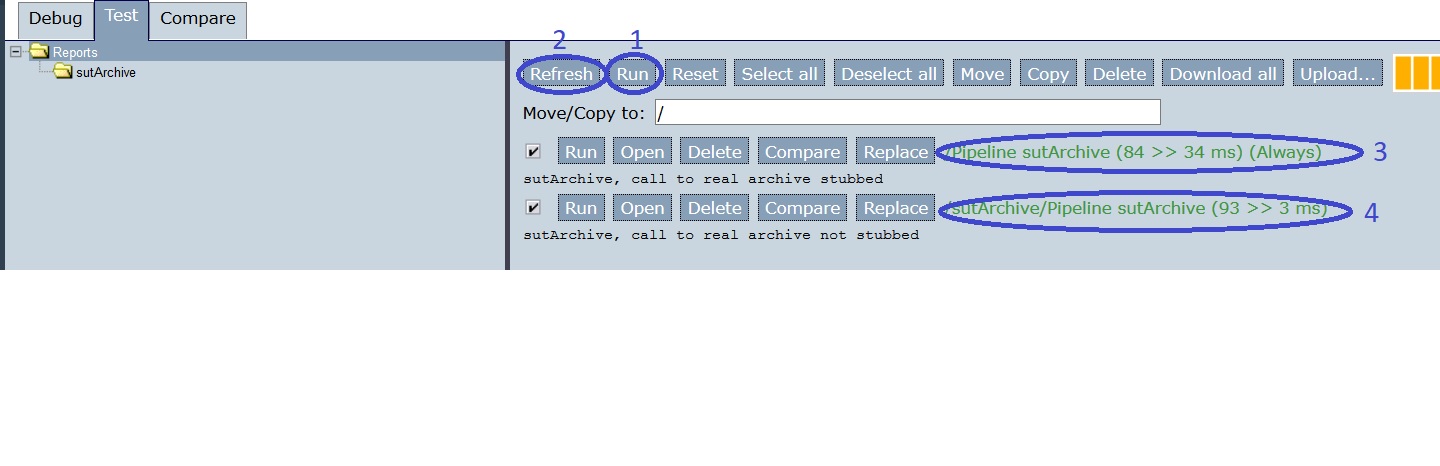
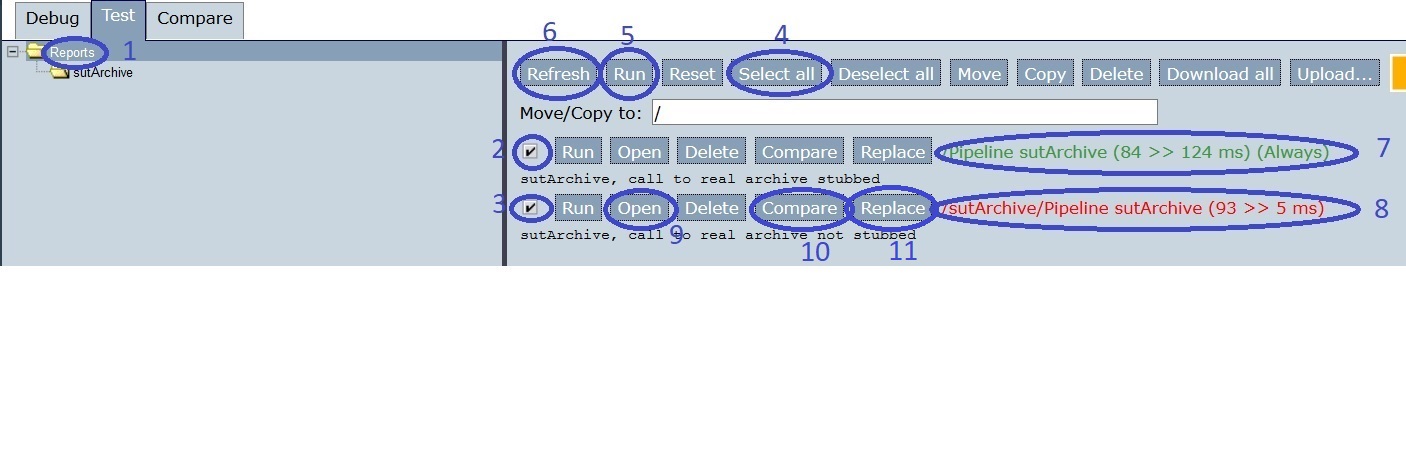
You are in tab “Test” (number 1). Press “Refresh” (number 2) and then you see two captured tests about “sutArchive” (number 3). Then press “Open” for the newest test report, the one that does not have a description yet (number 4). The following screen appears:
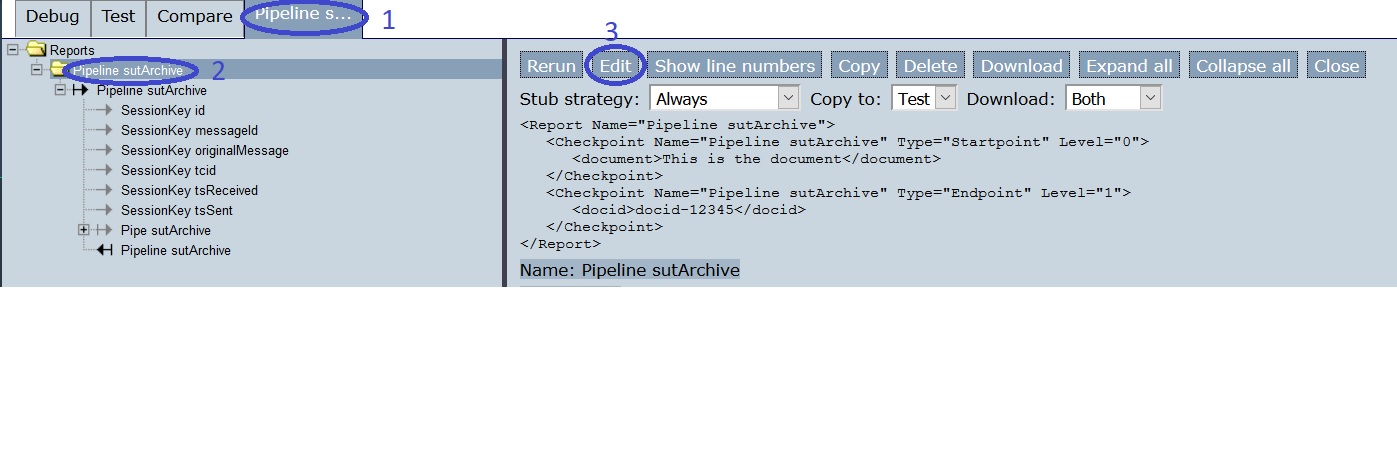
You are on a new tab (number 1). Select the uppermost “Pipeline” node (number 2). Then press “Edit” (number 3). The screen becomes as follows:
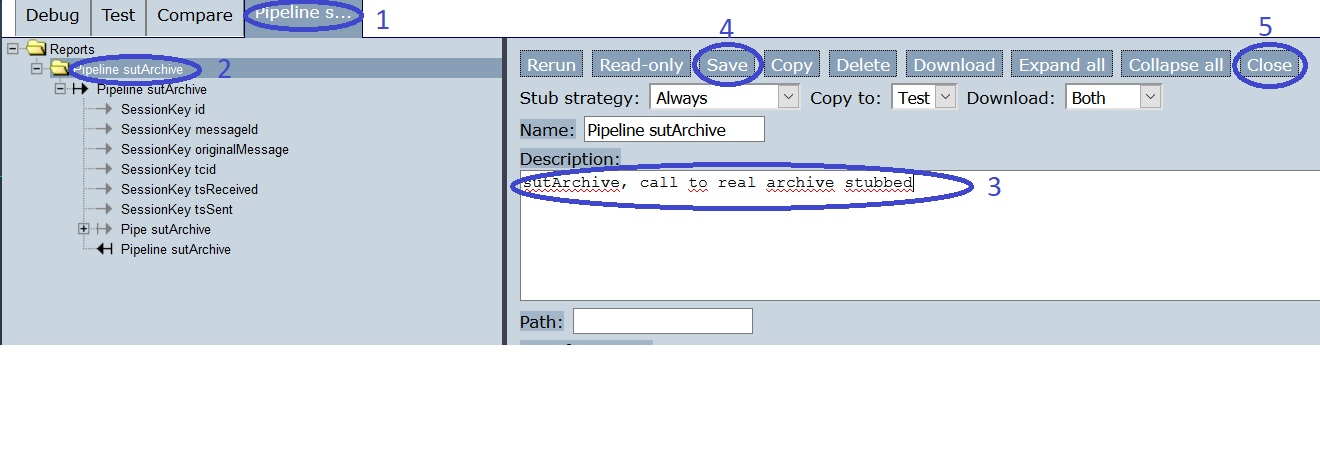
You are in the same tab (number 1). Click the uppermost “Pipeline” node (number 2). Edit the description to be
sutArchive, call to real archive stubbed(number 3). Press “Save” (number 4) and “Close” (number 5). The following screen appears:
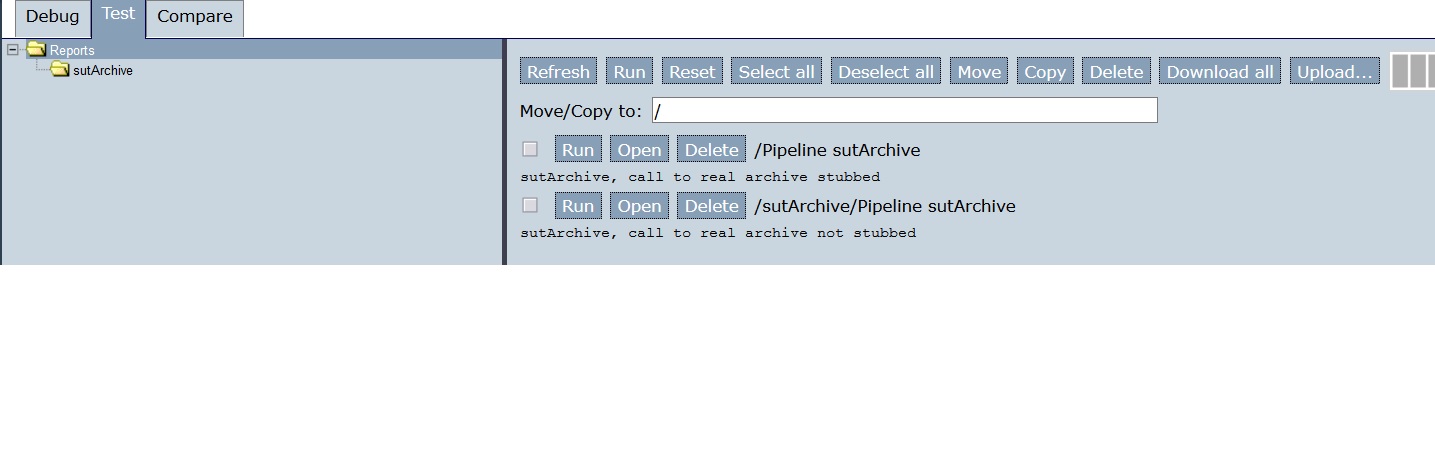
Select the topmost node (number 1). Press “Refresh” (number 2). Now you see two test reports about “sutArchive”, both having their description (number 3).
Press “Download all” (number 4). Then stop the Frank!Framework.
Now we change our System Under Test. It is the simplified electronic archive with a portal that calls the real electronic archive. We change the real electronic archive. In your project directory, open file
configurations/ladybug/Configuration.xml. Edit the name of the included file to becomeexternalModified.xml, as shown by the highlighted line:<?xml version="1.0" encoding="UTF-8" ?> <!DOCTYPE configuration [ <!ENTITY external SYSTEM "externalModified.xml"> <!ENTITY sut SYSTEM "sut.xml"> <!ENTITY dynamicId SYSTEM "ConfigurationDynamicId.xml"> ]> <Configuration> &external; &sut; &dynamicId; </Configuration>
Restart the Frank!Framework and press the refresh button of your webbrowser. Probably you still see your test cases. If not, upload the test reports you downloaded. Your screen should look as follows again:
Now select the topmost tree node (number 1 in the figure below). Then select all tests (numbers 2 and 3). Alternatively, you can use “Select all” (number 4). Then press “Run” (number 5) and “Refresh” (number 6).
If you want to investigate why a test failed, you can compare the expected result and the actual result. You can do this with the “Compare” button (number 10). This will be explained later in this tutorial.
The test report with stub strategy “Always” succeeds (number 7), while the test report with stub strategy “Never” fails (number 8).
Note
The stub strategy determines whether calls to external systems are stubbed or not. The call from the portal to the real archive (see Introduction) is an example. When such a call is stubbed (stub strategy “Always”), the Frank!Framework does not perform the call but uses a saved result of this call. The stubbed test report is not influenced by the modification of the external system and thus still succeeds. The not-stubbed test fails because you just changed the external system.
Note
Stub strategy “Always” is useful to reduce the scope of your test. Sometimes you just want to see whether your own adapter is right, regardless of changes in the outside world.
Let’s assume that the introduced change is not a bug. We edit the non-stubbed test report to fix the test. Press the “Open” button of the not-stubbed test report (number 9). You see the following:
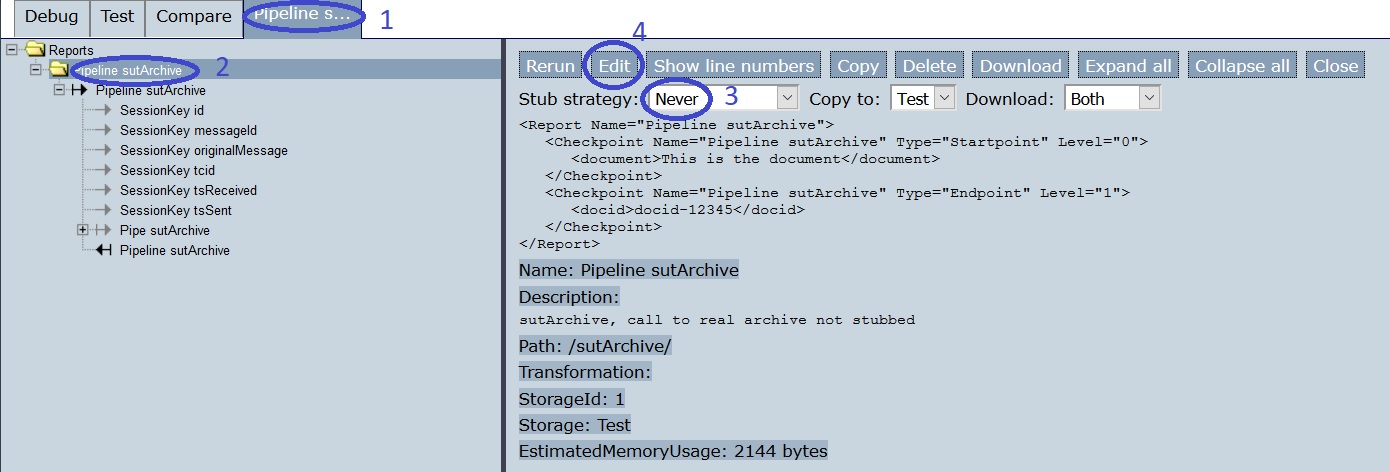
You are in another tab (number 1). Select the topmost “Pipeline” node in the tree view (number 2). Check that you have the test with stub strategy “Never” (number 3). Then press “Edit” (number 4). You see the following:
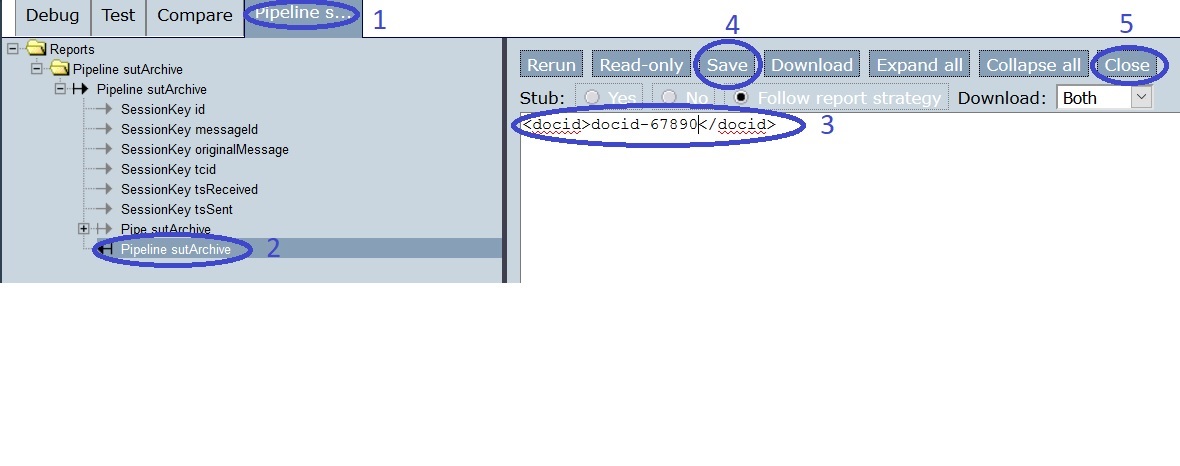
You are in the same tab (number 1). Expand all “Pipeline” nodes and select the bottom child node (number 2). Then edit the text field (number 3) to be:
<docid>docid-67890</docid>
Press “Save” (number 4) and “Close” (number 5). Here is the result:
Note
There is a shortcut for the last steps you performed. In tab “Test”, a button named “Replace” appears behind a test report when it is executed, see the figure of step 15, number 11. When you press this “Replace” button, the test report is edited such that the actual output becomes the expected output.
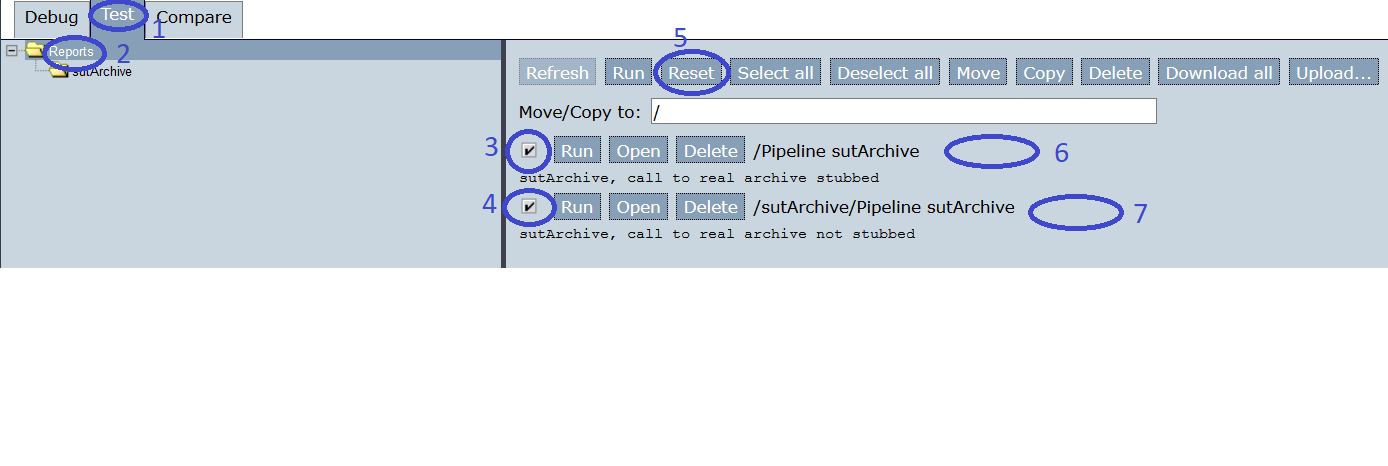
You are back in tab “Test” (number 1). Select the top-most node in the tree view (number 2). Select all test reports (numbers 3 and 4). Then press “Reset” (number 5). The green and red messages that were present before are gone (numbers 6 and 7).
Press “Run” (number 1 in figure below) and “Refresh” (number 2). Now both tests succeed again (numbers 3 and 4).