Organize test reports
In subsection Capture test reports you learned how to capture test reports and how to run them. If you have many test reports, it is useful to organize them. This subsection explains how to add a description to a test report, and shows you how to organize test reports into folders.
Preparations
Please do the following:
Ensure that the Frank!Framework is set up according to Preparations and that it is running. Go to Ladybug. Ensure that the report generator is enabled. See Windows or Linux.
Ensure that you have a captured test report of running adapter “sutGet”. This should be the case if you did subsection Save and load captured test reports. In this case, you can proceed to Organize.
If you do not have a test report of running “sutGet”, continue with this step. Click “Testing” in the picture below:
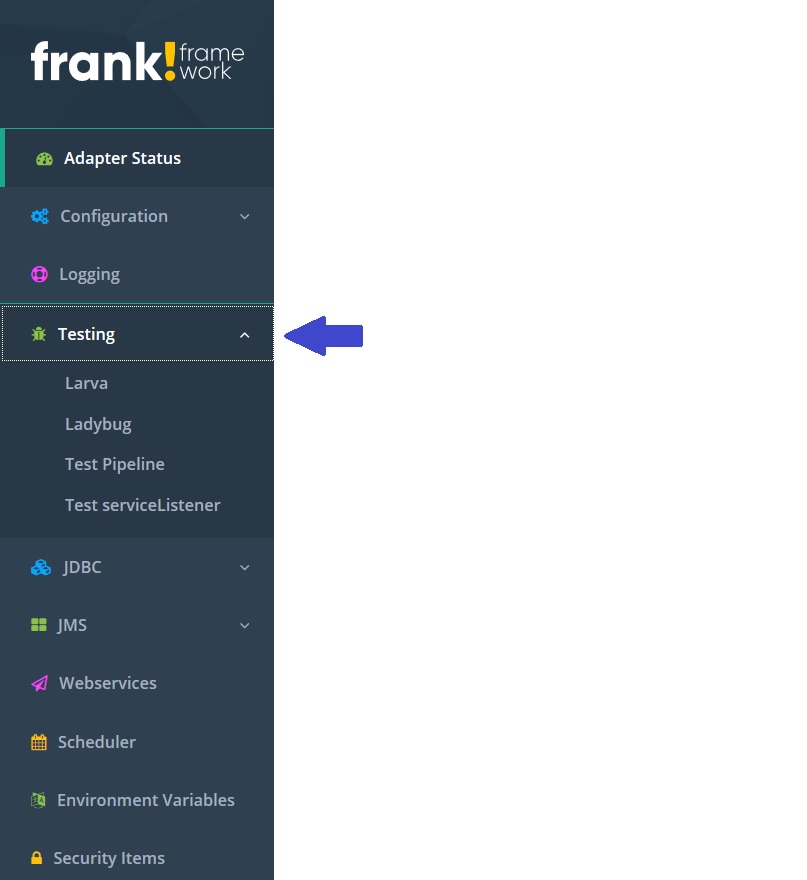
Click “Test Pipeline”. The following screen appears:
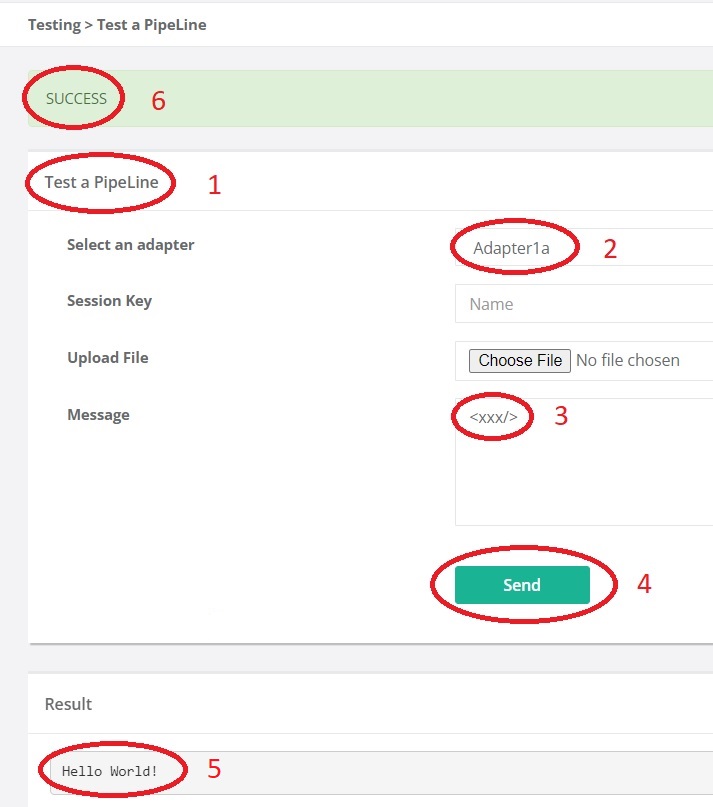
Select adapter “sutGet” (number 1)
Enter the following text in the message field (number 2):
<docid>docid-12345</docid>
Press “Send” (number 3).
The result is shown below the send button:
Go back to Ladybug.
Select the line corresponding to the execution of “sutGet”. This is shown with number 1 in the picture below:
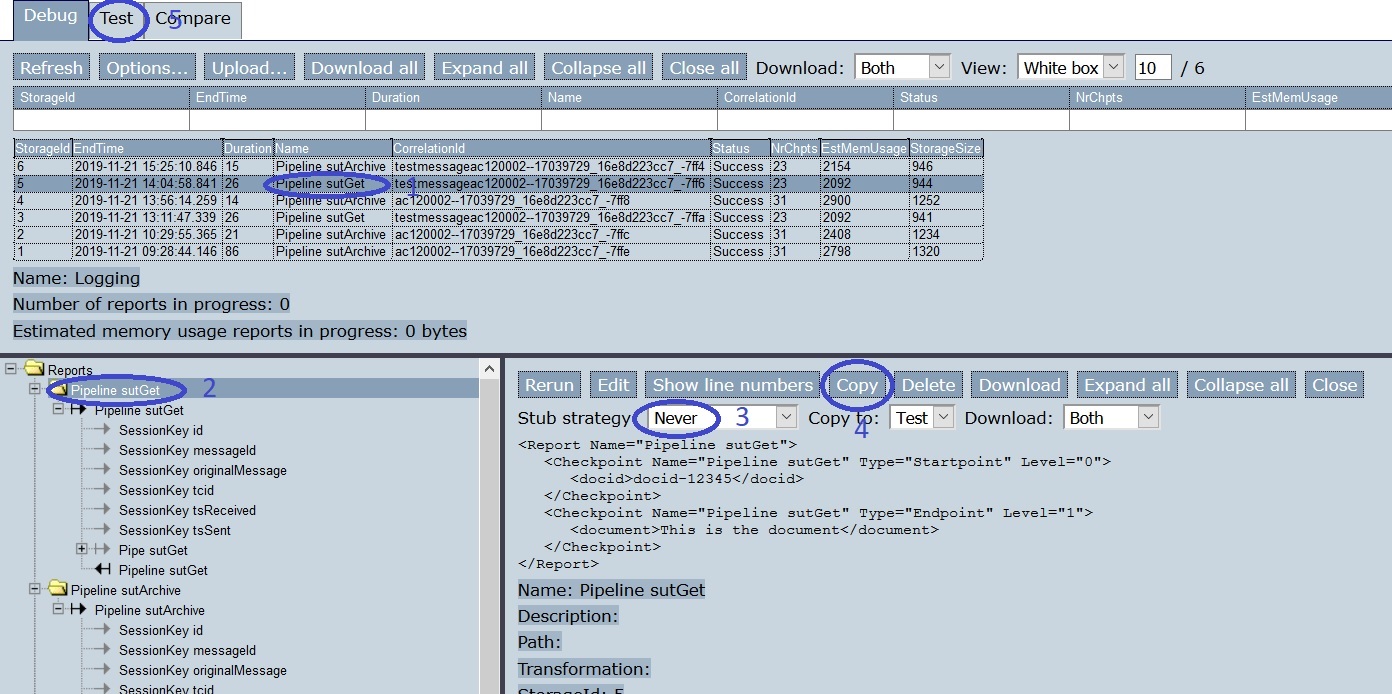
Select the upper-most “Pipeline” node (number 2).
Select stub strategy “Never” in the pull down menu with number 3.
Press “Copy” (number 4).
Go to tab “Test” (number 5). This changes the screen as shown:

You see you are in tab “Test” (number 1). Press “Refresh” (number 2). This causes your captured test report to appear (number 3).
This step finishes your preparations.
Organize
Now that you are prepared, you can learn how to organize your test reports. Please do the following:
We capture another test report first. Click “Test Pipeline”. Select adapter “sutArchive” (number 1 of the picture below):
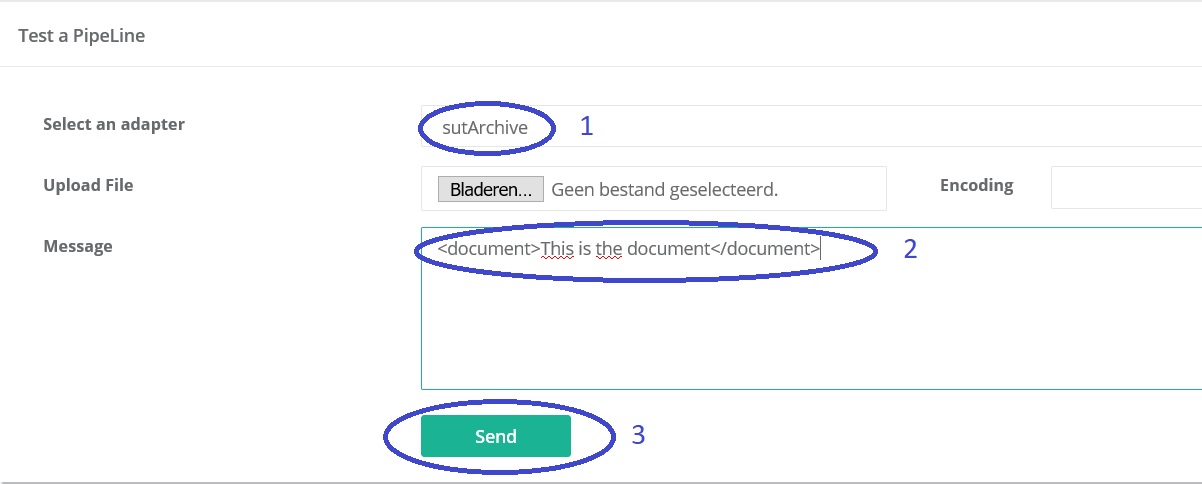
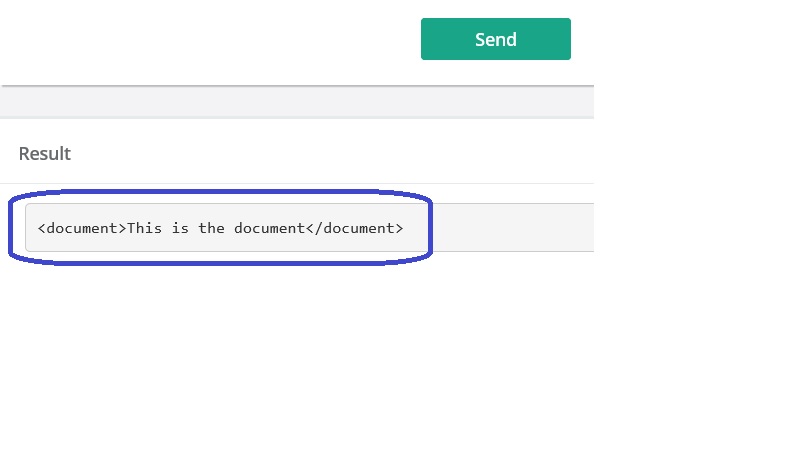
In the message field (number 2), enter the following XML:
<document>This is the document</document>
Press Send (number 3). Below the send button, the following XML should appear:
<docid>docid-12345</docid>
Press “Ladybug”, then button “Refresh”:

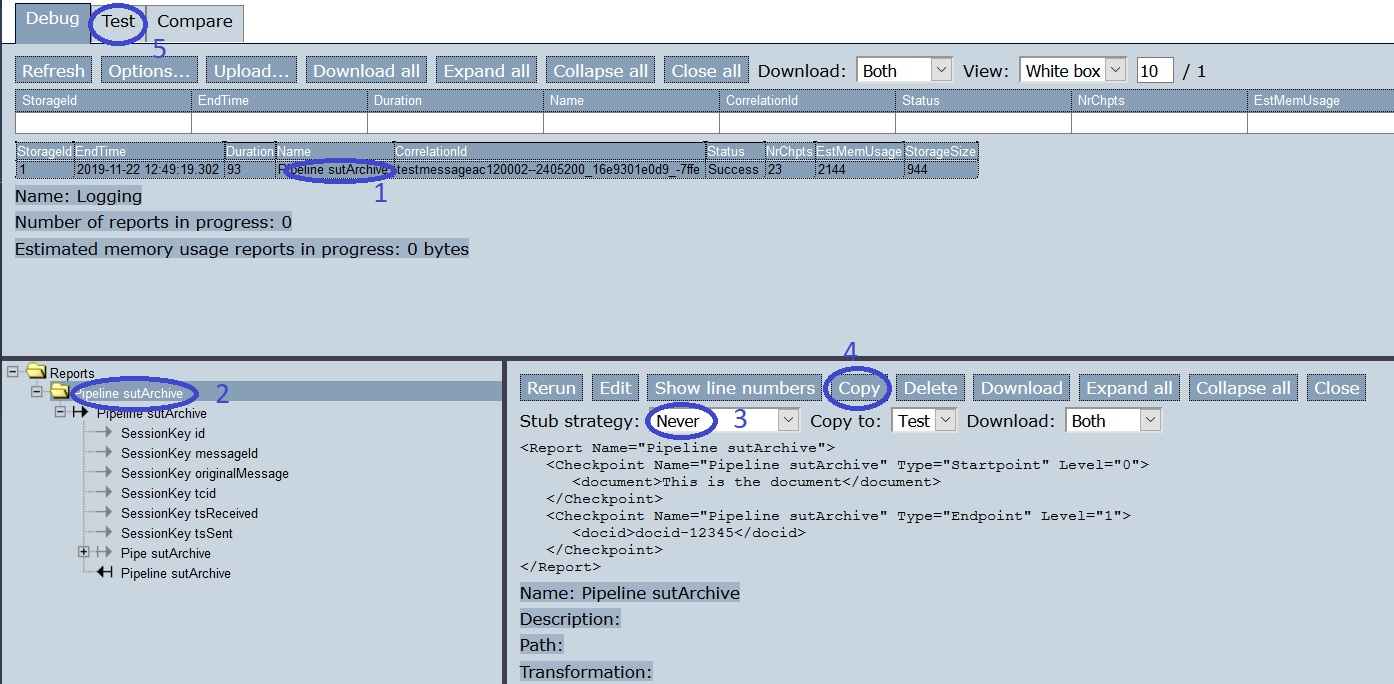
Select the line reporting about “sutArchive” (number 1 of picture below). Select the upper-most “Pipeline” node (number 2). Set the stub strategy to “Never” (number 3) and press “Copy” (number 4). Then press tab “Test” (number 5).
You see that you are in tab “Test” (number 1 of picture below). Press Refresh (number 2). You see two test reports now, one about “sutGet” and one about “sutArchive” (number 3).
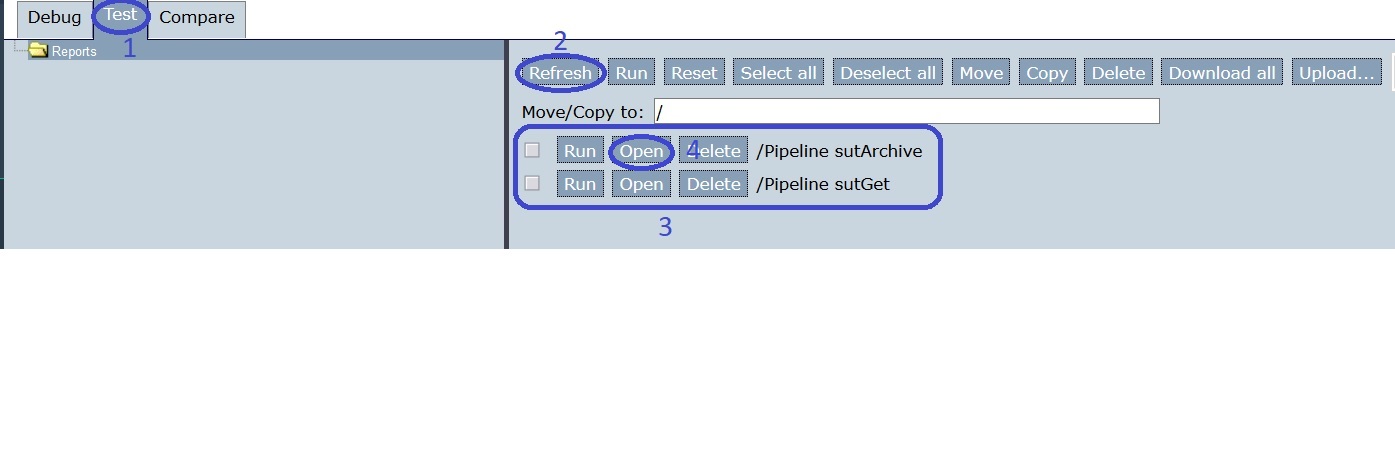
Press the “Open” button of “sutArchive” (number 4). You see the following:
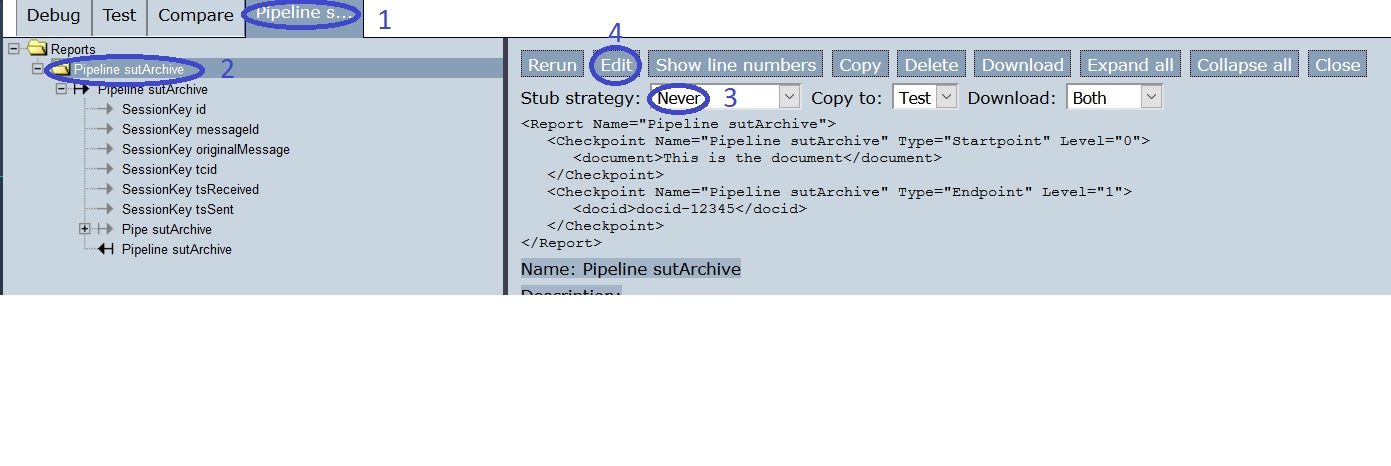
A new tab has been created (number 1). Select the uppermost “Pipeline” node (number 2). You can see that the stub strategy was “Never” when the test report was captured (number 3). Press “Edit” (number 4). The following screen appears:
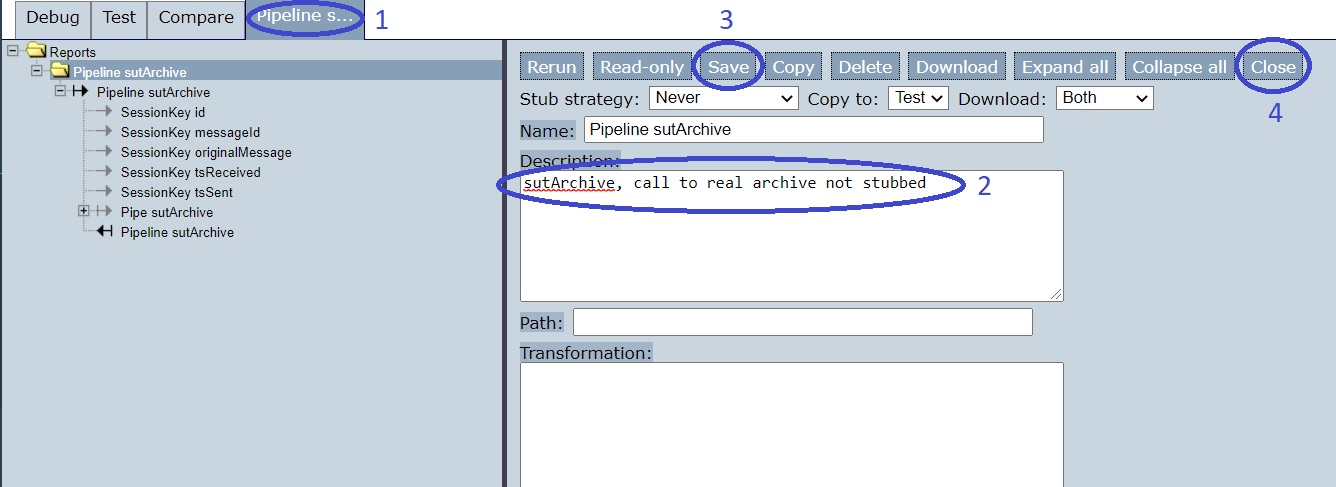
The tab name stays the same (number 1). Edit the description field (number 2). Write the following text:
sutArchive, call to real archive not stubbed
Note
This description references the architecture of the simplified electronic archive as introduced in Introduction. It emulates a real archive combined with a portal, the portal servicing the user and delegating user calls to the real archive. This set-up allows us to demonstrate the impact of the stub strategy in subsection Edit test reports.
Please remember that tests also have a name that you can edit (number 4).
Press Save (number 3 in the figure of step 8) and Close (number 4). You go back to the “Test” tab as shown with number 1 in the picture below:
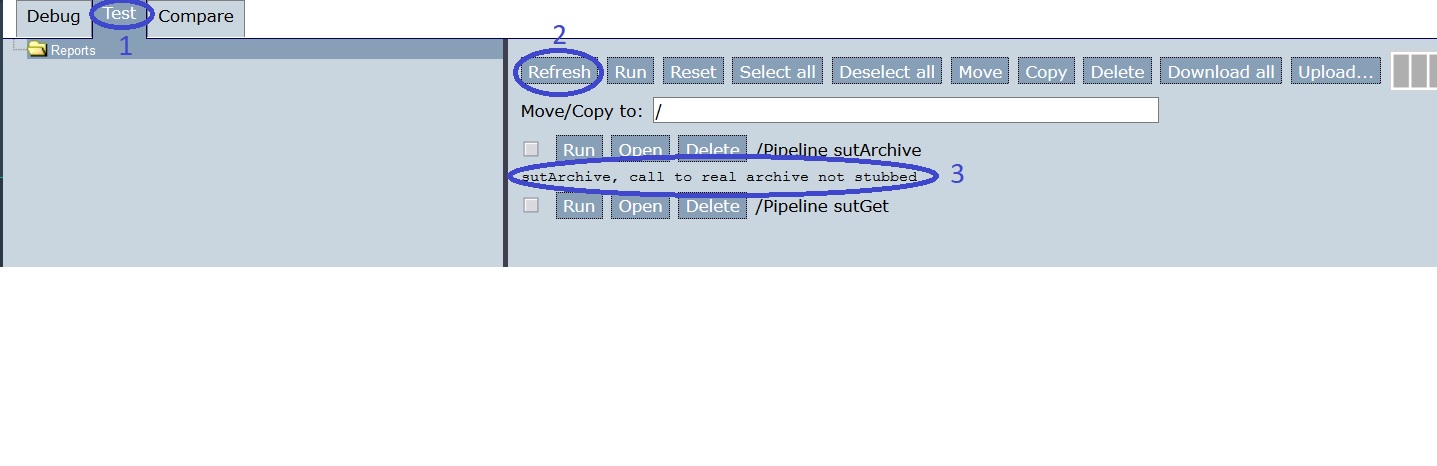
Press Refresh (number 2) to see the new description (number 3).
Now we will move the “sutArchive” test to a new folder “sutArchive”, see the figure below:
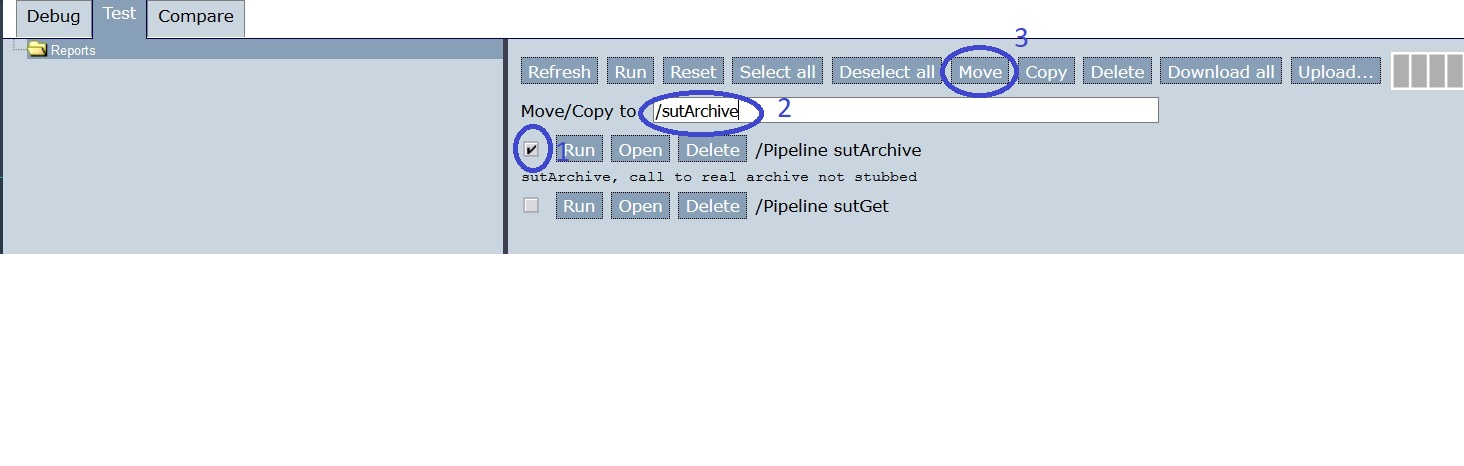
Select the “sutArchive” test (number 1). Enter the following for the destination folder (number 2):
/sutArchive/
Press “Move” (number 3).
Note
Next to the “Move” button, there is a “Copy” button. This button is like the “Move” button but duplicates the test report instead of moving it. This is useful, because you can also edit test reports as you will see in the next subsection Edit test reports. You can thus copy test reports and then edit the copy. This way, you can easily create similar test reports. You do not always have to do a test manually to automate it.
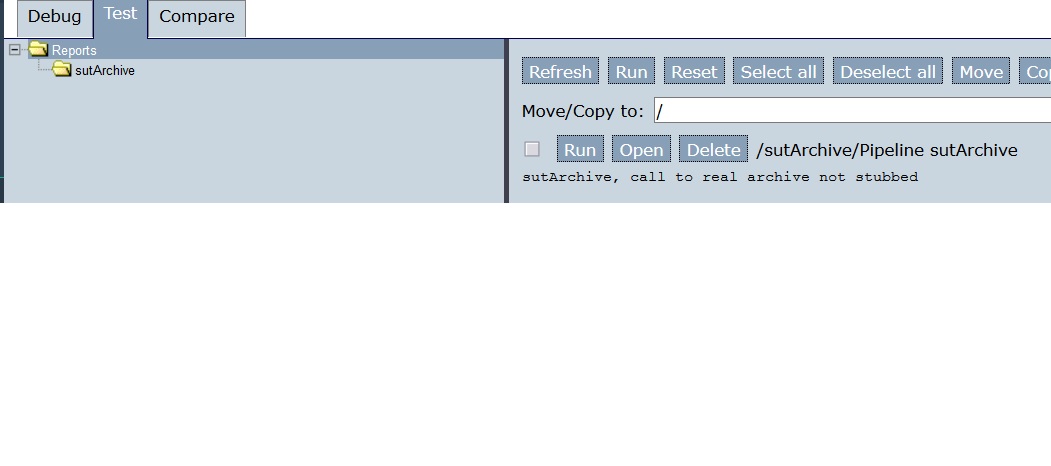
The new folder is selected as shown in the figure below.
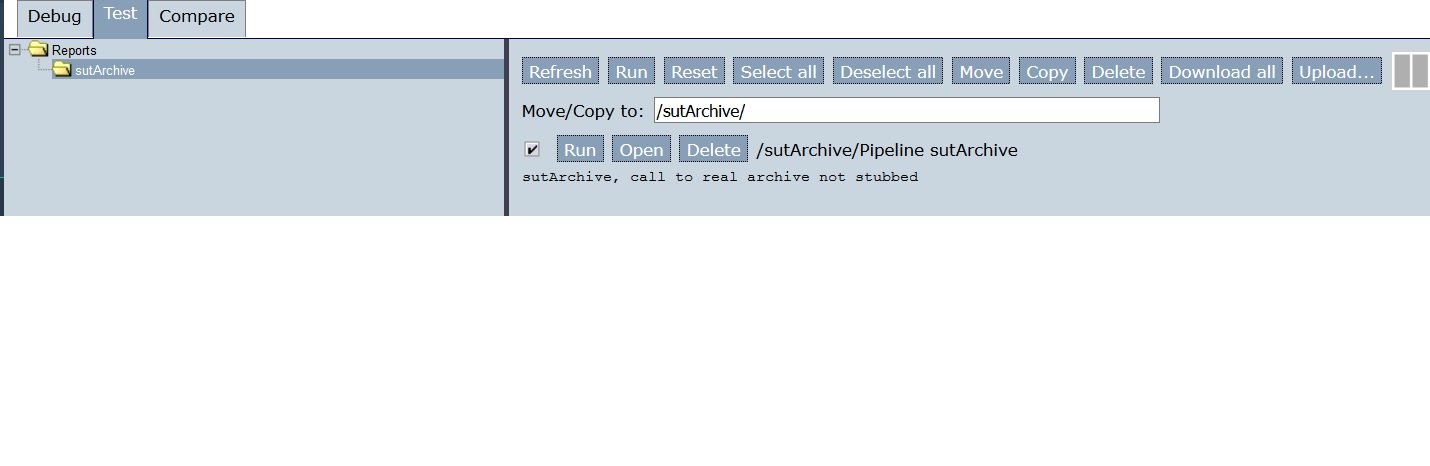
As shown in the figure below, select the top node of the tree view (number 1). Now you see all test cases again. You see the folder names as part of the test report names (number 2).
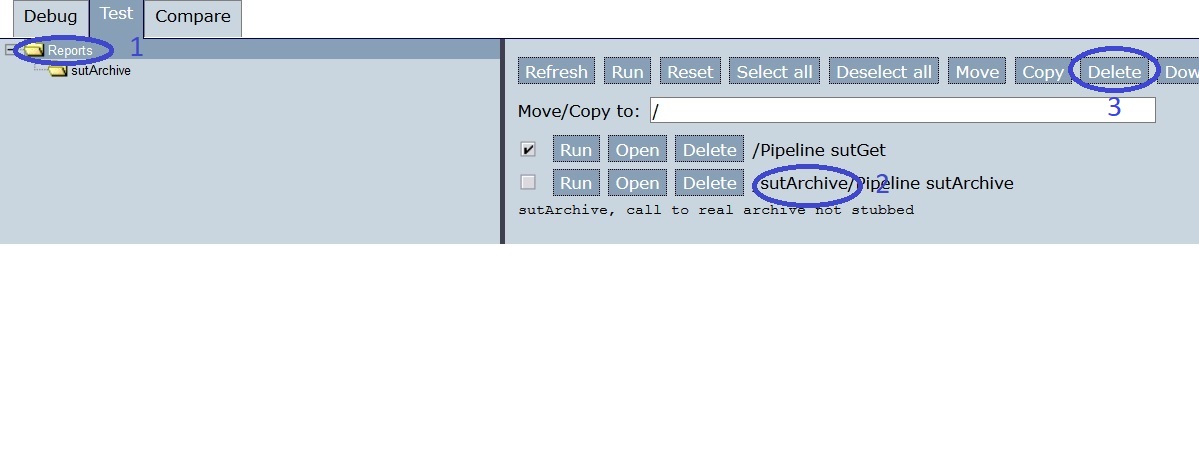
Finally, you can remove test reports. Ensure that “sutGet” is selected and “sutArchive” is deselected as shown. Then press “Delete” (number 3).
You get a confirmation dialog. After proceeding, you see that test report “sutGet” is gone:
If you want to pause, you may do “Download all”. Then you can upload later when you have time to continue.