Variables
In subsection Edit test reports, you learned how to edit captured test reports. In this section, you will learn how to introduce variables into them. You can use this feature to quickly create a group of similar test reports. Variables also help you to document your test reports. Like the name and the description of a test report, variables stand out.
Preparations
To do this subsection, your Frank should be like you left it after sub-subsection Test-specific ignore. If you just did that subsection, you can skip these preparations and continue to Introduce a variable. Otherwise, please do the following:
Do subsection Preparations.
If you ever did subsection Ignore elements, you should have updated
Configuration.xmlto referenceexternalTime.xmland you should have a filesavedTestsWithNewTransformation. In this case, please upload these test reports and continue with Introduce a variable.Otherwise, please do subsection Ignore elements.
Introduce a variable
Please go to Testing | Ladybug and select tab Test. You should see one test report of running adapter “sutGet”, as shown:
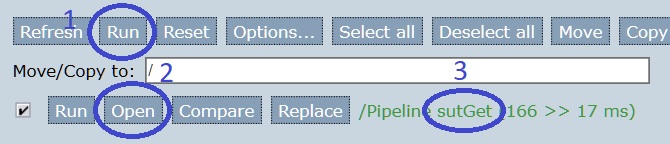
If you do not see the green text, press “Run” (number 1). Please check that the test repost succeeds.
Please check that your test report is about “sutGet” (number 3).
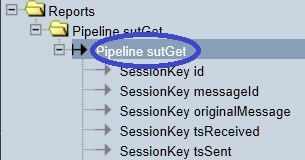
Press “Open” (number 2). A new tab opens as is shown in the figure below (number 1).

Select the topmost “sutGet” node (number 2), then press “Edit” (number 3). You stay in the same tab.
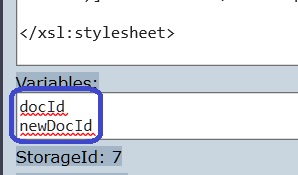
Scroll down until you see the label “Variables”. In the text field below that, please enter the following text:
docId
newDocId
Your screen should look as follows:
Press “Save” (not shown).
In the tree view to the left, select the inner “sutGet” node as shown:
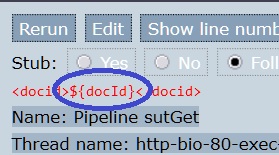
In the text field to the right (number 1 in the figure below), replace the existing text with this:
<docid>${docId}</docid>: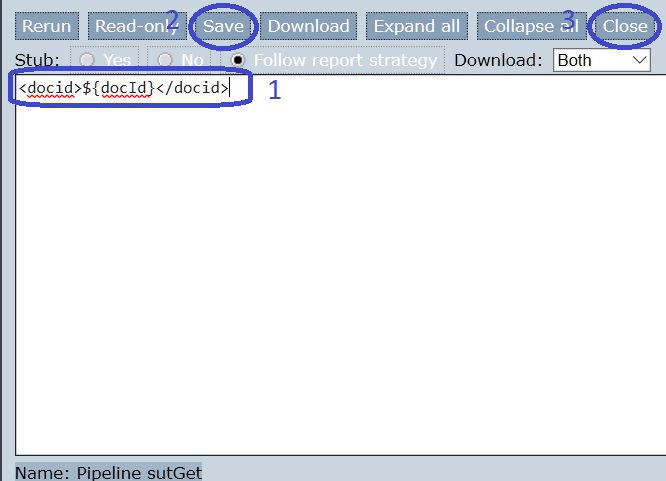
Press “Save” (number 2) and “Close” (number 3). You return to tab “Test” as shown below:
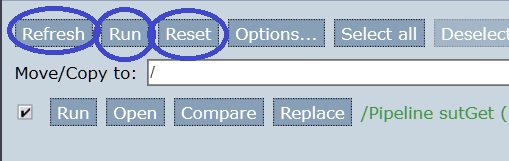
Rerun your test report by pressing “Reset”, then “Run” and then “Refresh”. Your test should still succeed.
Next to your test report, you see the variable and its value.

Note
When you use variables, you see their names and their values in tab Test, next to the name and the description of each test report. You see that variables are useful for documenting your test reports.
Press “Compare”. You see you are in the “Compare” tab (number 1 in the figure below):
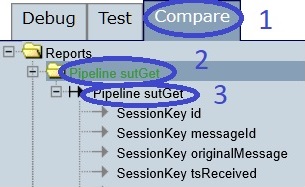
Select the topmost “sutGet” node (number 2). To the bottom, you see that the value of your
docIdvariable is applied.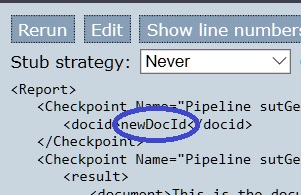
Select the second “sutGet” (number 3 of the previous figure). You see the variable name to the bottom-left.
Note
The text is red because taken literally it differs from the bottom-right. To the bottom-right, you see the value of variable “docId” while to the left you see the variable reference.
You learned how to introduce one variable into a test report, but you can introduce as many variables as you like. You assign them writing “comma-separated” text but with separator ;. In the “Variables” panel you encountered in step 6, you would get something like this:
variable1;variable2
valueOfVariable1;valueOfVariable2
Clone test report
In subsection Organize test reports, you learned how to copy test reports. You learned that this features is useful for creating similar test reports without having to do each of them manually. This section shows a very similar feature that works well with variables. Next to the “Copy” button in tab “Test”, there is a “Clone” button. This clone button makes copying a bit more efficient. In this sub-subsection you learn how to use this button. Please continue as follows:
Select your test report. Then enter folder name
/clonesand finally press “Clone” as shown below.
The “Generate report clones” dialog appears as shown below. In the “Variable CSV” panel, please enter
docIdas the first line, the name of your variable. Every next line contains a value for which you want a clone. For the additional lines, enter0001,0002and0003. For each of these values, a test report is created in which the variabledocIdgets this value.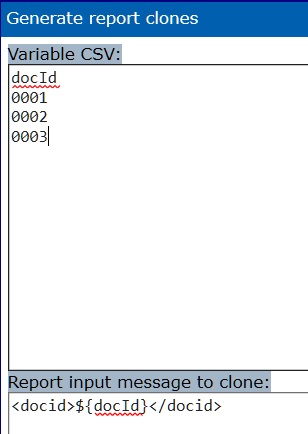
You can leave the “Report input message to clone” panel unchanged, because you introduced the variable
docIdbefore. If you had not, you would have to update the text to reference the variable.Press the “Generate” button to the bottom (not shown). You see tab “Test” again and you see your copies as shown below.
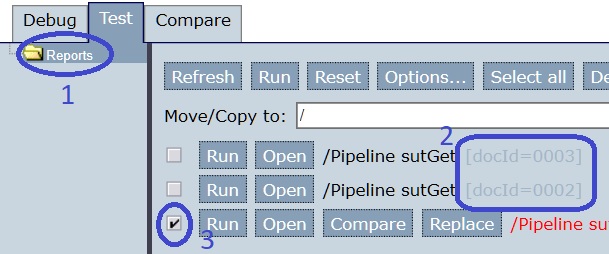
You see a few surprises here. The folder name
/clonesfolder you entered before pressing “Clone” has been ignored. Your copies have appeared in the root folder “Reports” (number 1).You see three test reports instead of four. For two of these, the figure shows the variable name and the value. These values are
0002and0003.For the original test report, the value of
newDocIdhas been replaced by the first value you entered in the “Generate report clones” dialog, which is0001. This does not fit on the figure, but you can see it when you do this tutorial.By pressing “Open” and “Edit” and by selecting the topmost “sutGet” node, you can get the page shown below. Please check that your XSLT transformation is still present and that you have a variable
docIdwith value0001.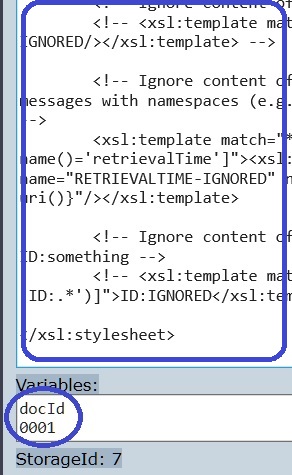
Please check that your two clones both have variable
docIdand that one of them assigns the value0002while the other assigns the value0003. Please also verify that the clones have the transformation.
Note
What happens if you use “Copy” instead of “Clone” on a test report with variables? In that case, the transformation and the variables are copied as well. “Copy” is really quite similar to “Clone”.