Test-specific ignore
In the previous sub-subsection we demonstrated global ignores. In tab “Debug” we opened Options | Transformation and updated the XSLT transformation we found there. We saved our updated transformation in file updatedTransformation.xsl.
In this sub-subsection we demonstrate that this global XSLT transformation is not saved along with your test reports. After this, we do a test-specific ignore.
Please do the following:
In Ladybug, go to tab “Test” (number 1). Press “Download all” (number 2). Finish the file save dialog to save your tests. We will refer to this file as
savedTestsAfterTransformation.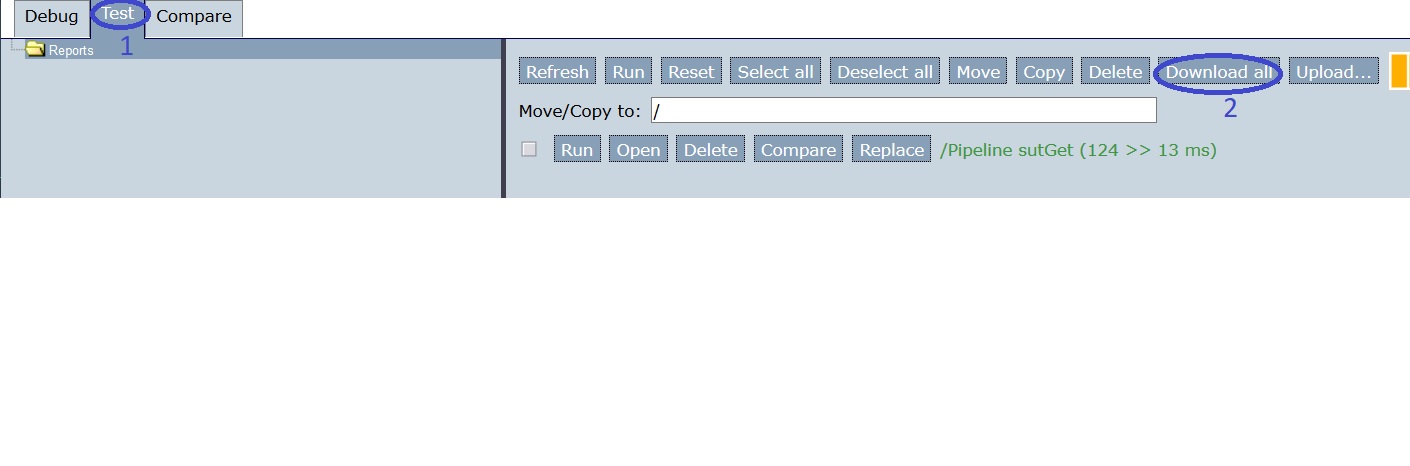
Stop the Frank!Framework. Go to the tests directory within your Frank2Manual directory. Within the tests directory there should be files satisfying pattern “Pipeline *.report.xml”. Delete them.
Restart the Frank!Framework. Open Ladybug and go to tab “Test” (number 1 in the figure below). Press “Upload” (number 2) and select file
savedTestsAfterTransformation. Finish the dialog. This restores your tests.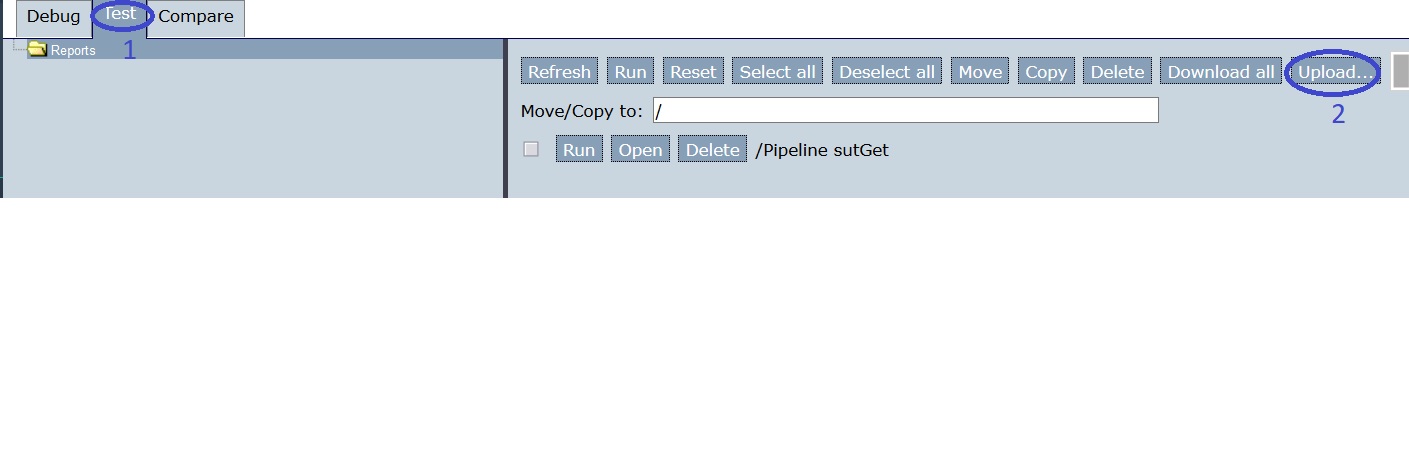
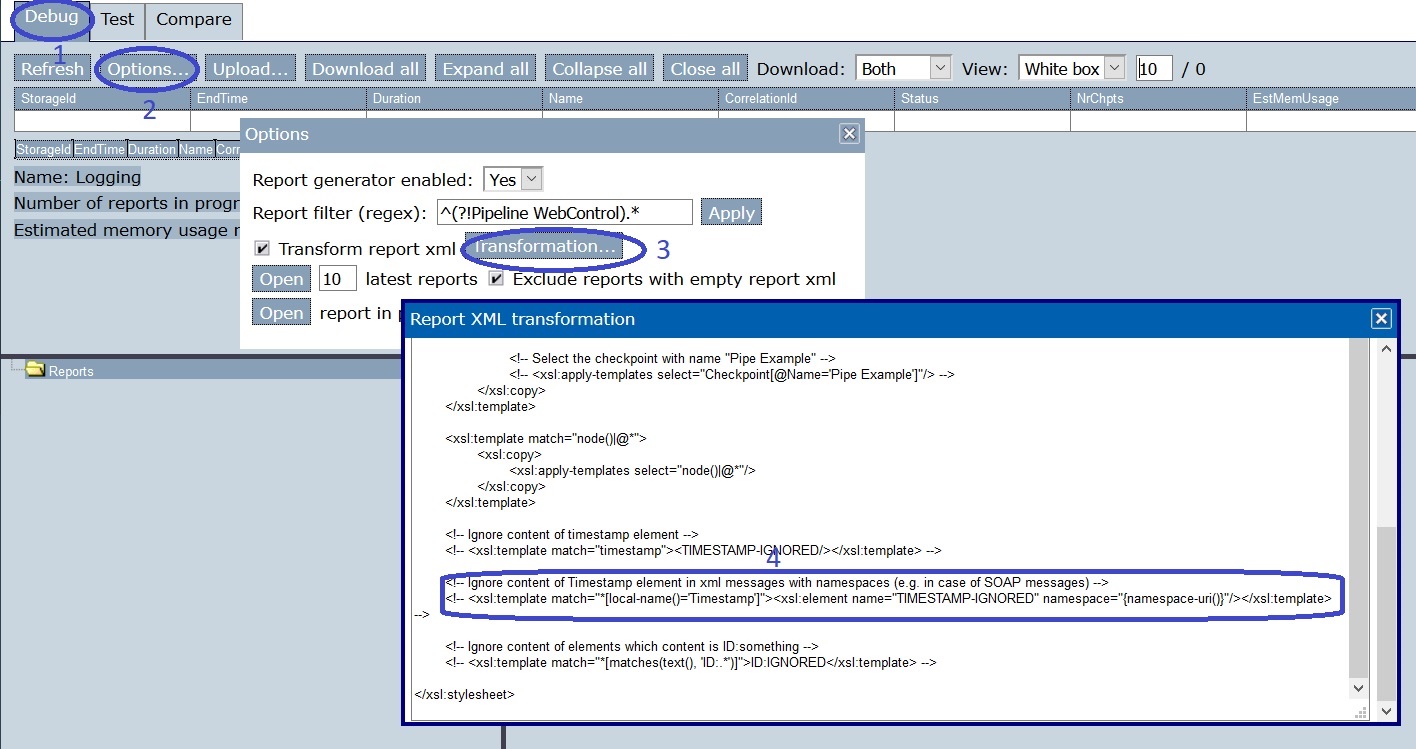
Go to tab “Debug” (number 1 in the figure below). Press “Options” (number 2) and “Transformation” (number 3). You can see that the change you did earlier is not restored (number 4).
We will not restore the global transformation, but we will examine test-specific ignores. Go to tab “Test” (number 1 in figure below). You can see that your uploaded test is present (number 2).
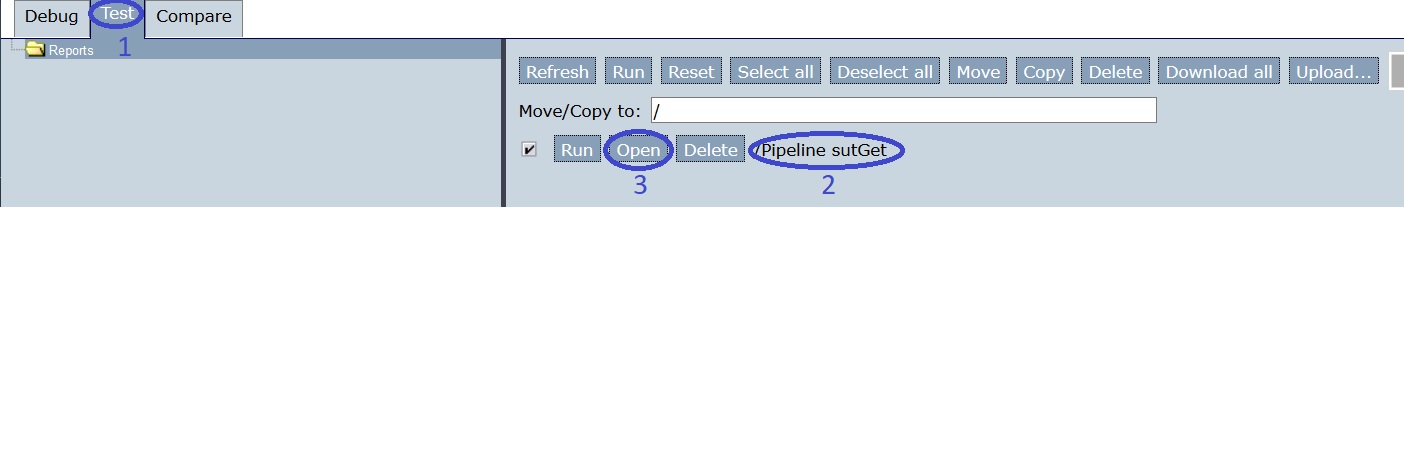
Press “Open” (number 3). You see the figure below. You are in a new tab (number 1). Select the topmost “Pipeline” node in the tree view (number 2).
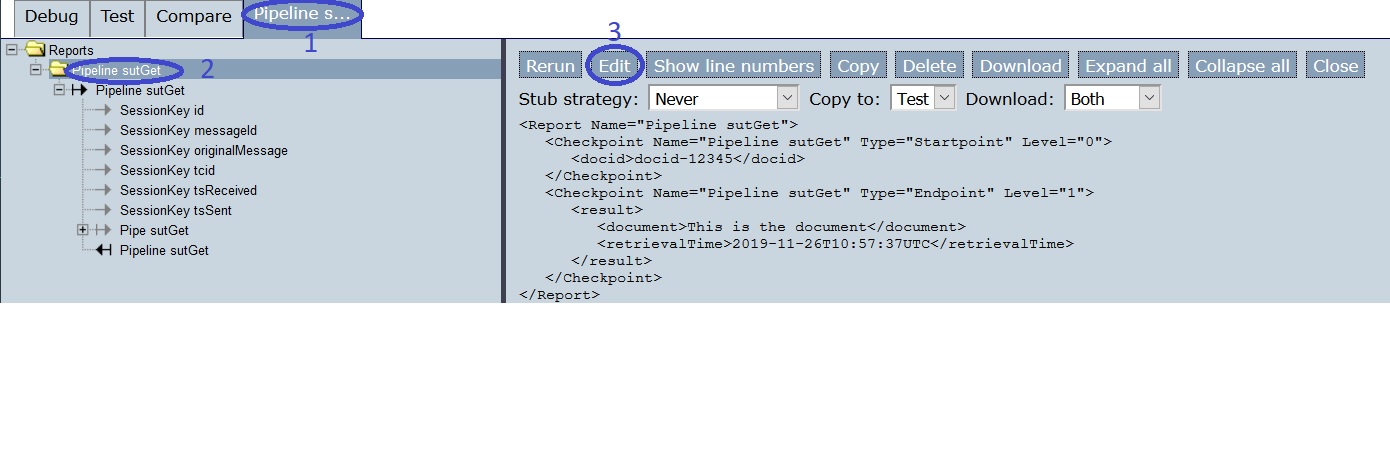
Press “Edit” (number 3). You see the figure below. The tab stays the same (number 1). Select the topmost “Pipeline” node (number 2). Then copy the contents of file
updatedTransformation.xslto the clipboard. This is the updated XSLT transformation you had earlier in the Options | Transformation dialog.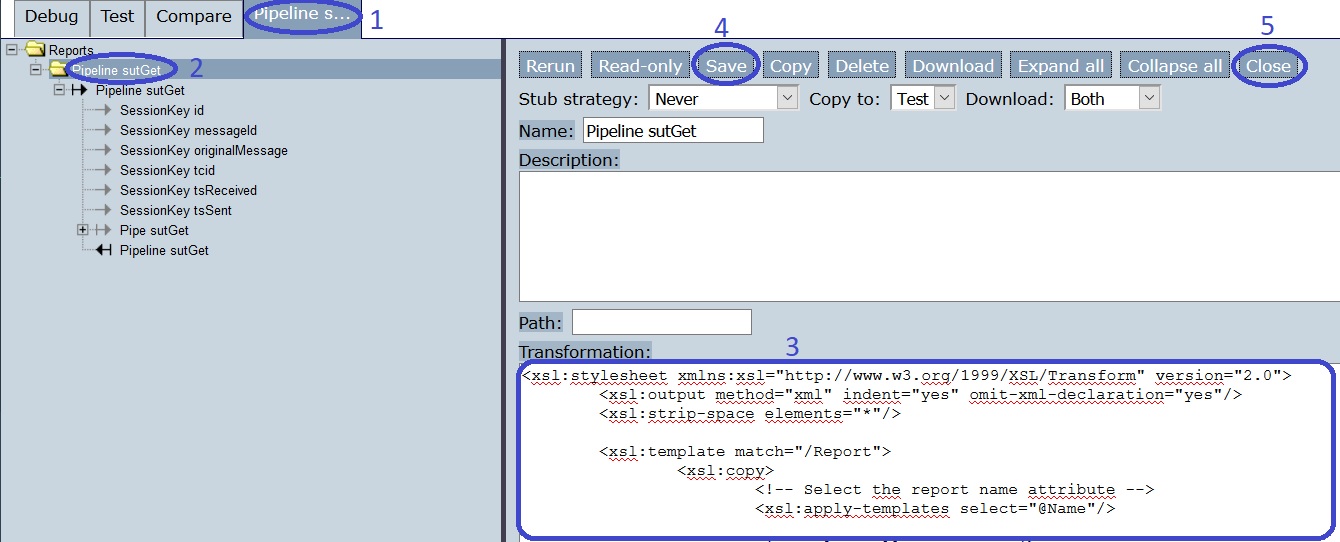
Paste the XSLT transformation from the clipboard to the Transformation field (number 3). Press “Save” (number 4) and “Close” (number 5).
Note
In the Options | Transformation dialog, a default XSLT transaction was available. It had comments telling you how to update the transformation. The edit screen of a test report has an empty Transformation field. It is good to know that you can paste the transformation from Options | Transformation there.
You are back in tab “Test” (number 1 in the figure below). Press “Reset” (number 2) and the “Run” button of your test report (number 3). You see that your test succeeds again (number 4).
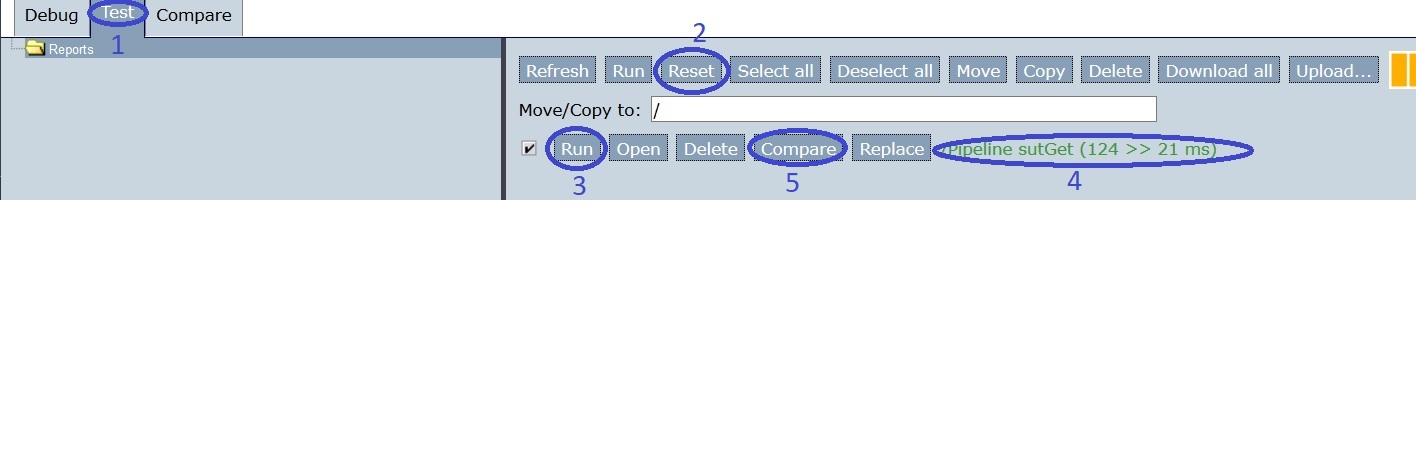
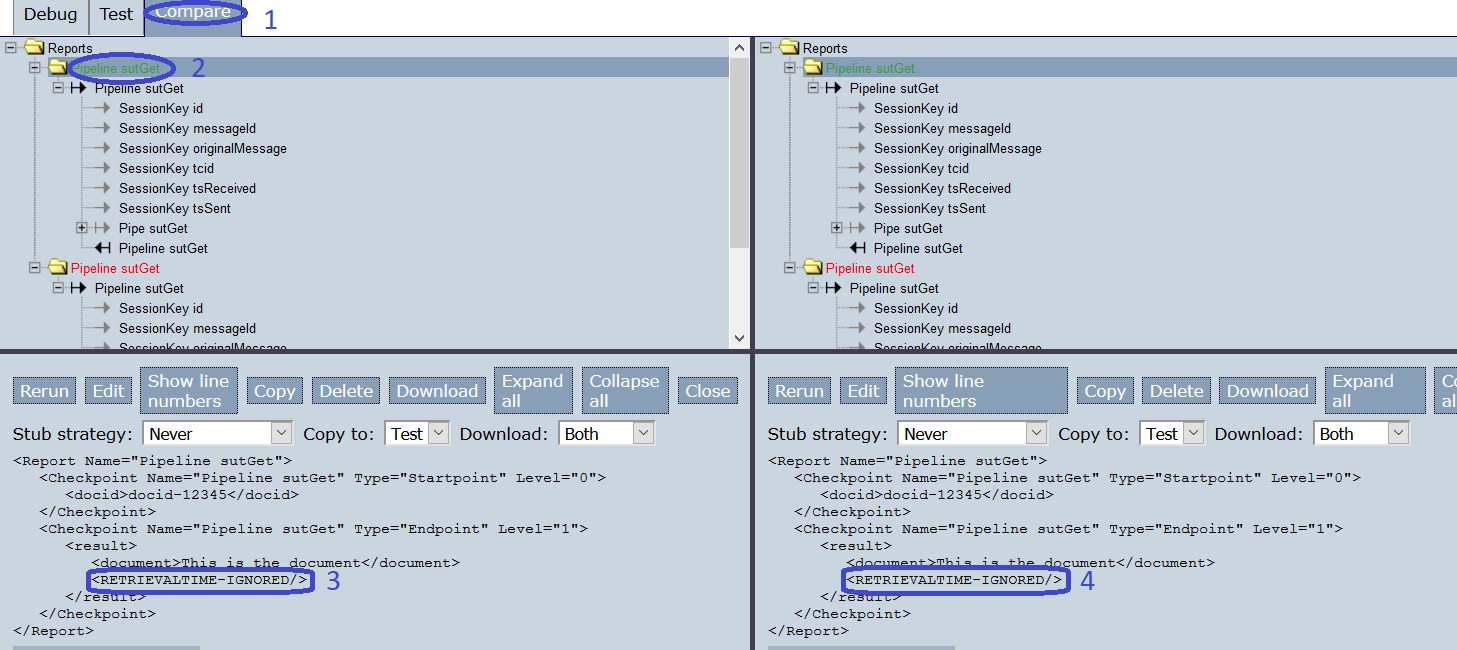
Press “Compare” (number 5). The screen becomes as shown below. You are in tab “Compare” (number 1). Select the topmost “Pipeline” node (number 2). You see the text “RETRIEVALTIME-IGNORED”, both to the bottom-left and to the bottom-right (numbers 3 and 4).
Please save your test reports. The updated transformation will now be included. We will refer to your saved test scripts as
savedTestsWithNewTransformation.